Best Aesthetic Note Taking App for 2024 (Free & Easy-to-Use)
As students, we have to do a lot of note-taking. Unfortunately, taking notes can often feel like a hassle.
You might be familiar with these issues:
The amount of time it takes to write handwritten notes
The difficulty in maintaining an organized system that enables you to access specific notes
I’ve experienced similar struggles. I used to handwrite all my notes, which took me a very long time. In addition, I couldn’t add complex diagrams or other visuals to my notes without printing them out.
Then, I started typing my notes in Google Docs and storing them in my Drive. However, my Drive soon became cluttered, and it wasn’t easy to access unless I was on my desktop. Even then, navigating through the hierarchy of folders felt like an inconvenience.

That’s when I came across Notion. Notion is an extremely powerful all-in-one workspace, which I believe is also one of the best aesthetic note-taking apps for students.
Since using Notion for note-taking, I’ve been able to:
- Take notes faster
- Organize and access my notes quickly
- Study and retain information better
Plus, as I mentioned, Notion makes it easy to make your notes aesthetically pleasing, which never hurts.
If you want to learn how to use Notion to transform your note-taking quality and organization, keep reading!
Here is exactly what I’ll be covering in this post:
- How to take aesthetic notes in Notion
- How to organize your notes in Notion
- How to use Notion’s features to improve understanding and retention
(P.S. If you don’t want to set up a Notion note-taking system on your own, you can download my free template below!)
Quick Intro to Notion
If you’re unfamiliar with Notion, it’s an all-in-one workspace that you can use to organize your entire personal life. Here are a few ways I use Notion as a student:
- Weekly and daily planning
- Long-term project tracking
- Habit tracking
- Journaling
- Note-taking
Click here for a complete tour of my student Notion setup.
A common question I see is, “Is Notion hard to set up?” Here’s my two cents on this question: Notion does have a bit of a learning curve. However, if you spend some time playing around with the features, you’ll find that the interface is very intuitive and that the workspace is highly customizable.
One Last Thing Before We Jump In…
Before we get into the meat of the article, I want to introduce you to a few of Notion’s main features. I’ll be referring to these features in the rest of the article, so it’s best to get familiar with them.
Blocks
Notion layouts consist of blocks. The most basic block is the text block, which is also the default block when you click anywhere on the screen.
Notion has a ton of other blocks, including blocks for adding images, quotes, bulleted lists, and checklists.
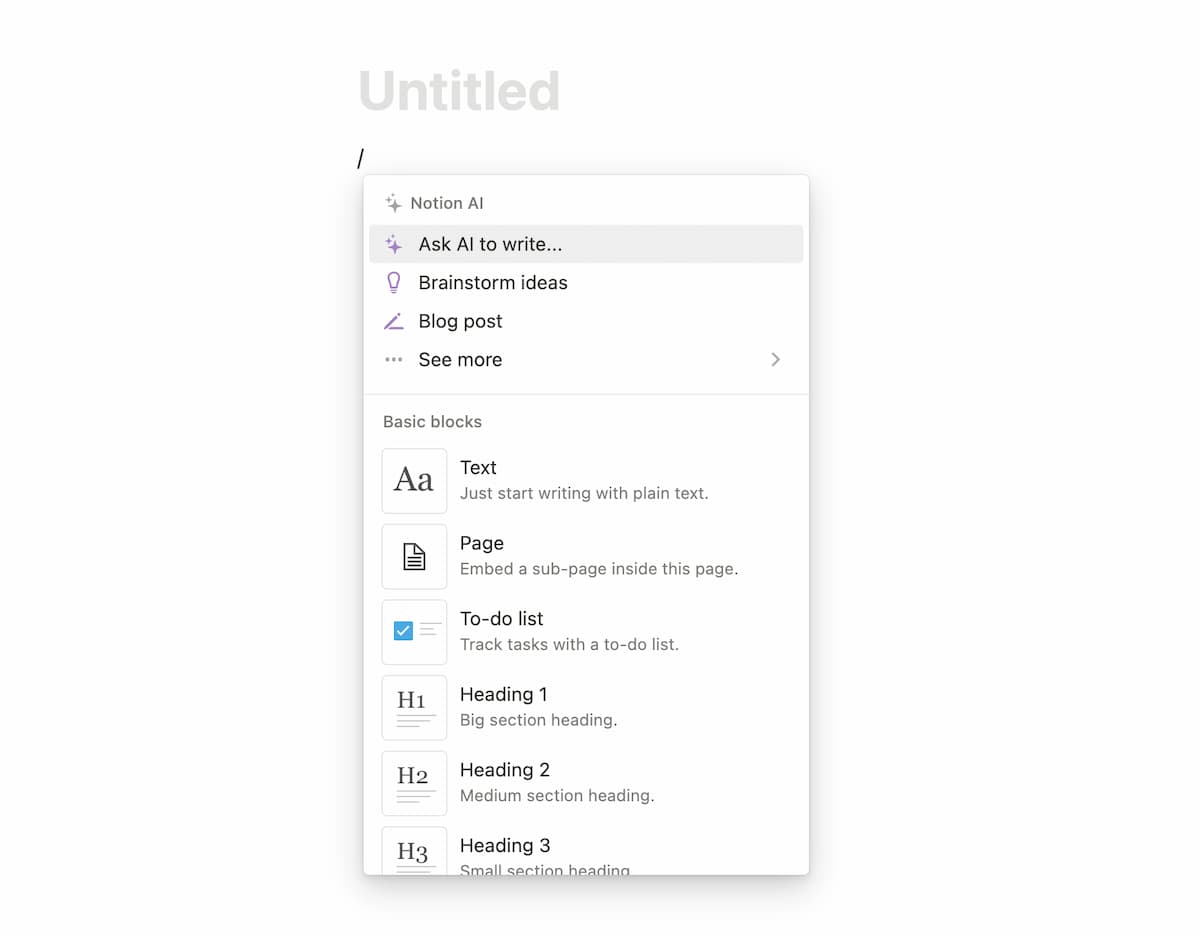
Hit backslash to open up all the options for Notion blocks.
You can also embed content in blocks. For instance, I’ve embedded PDFs from my Google Drive, my Google Calendar, a weekly weather forecast, and more in my Notion layouts!
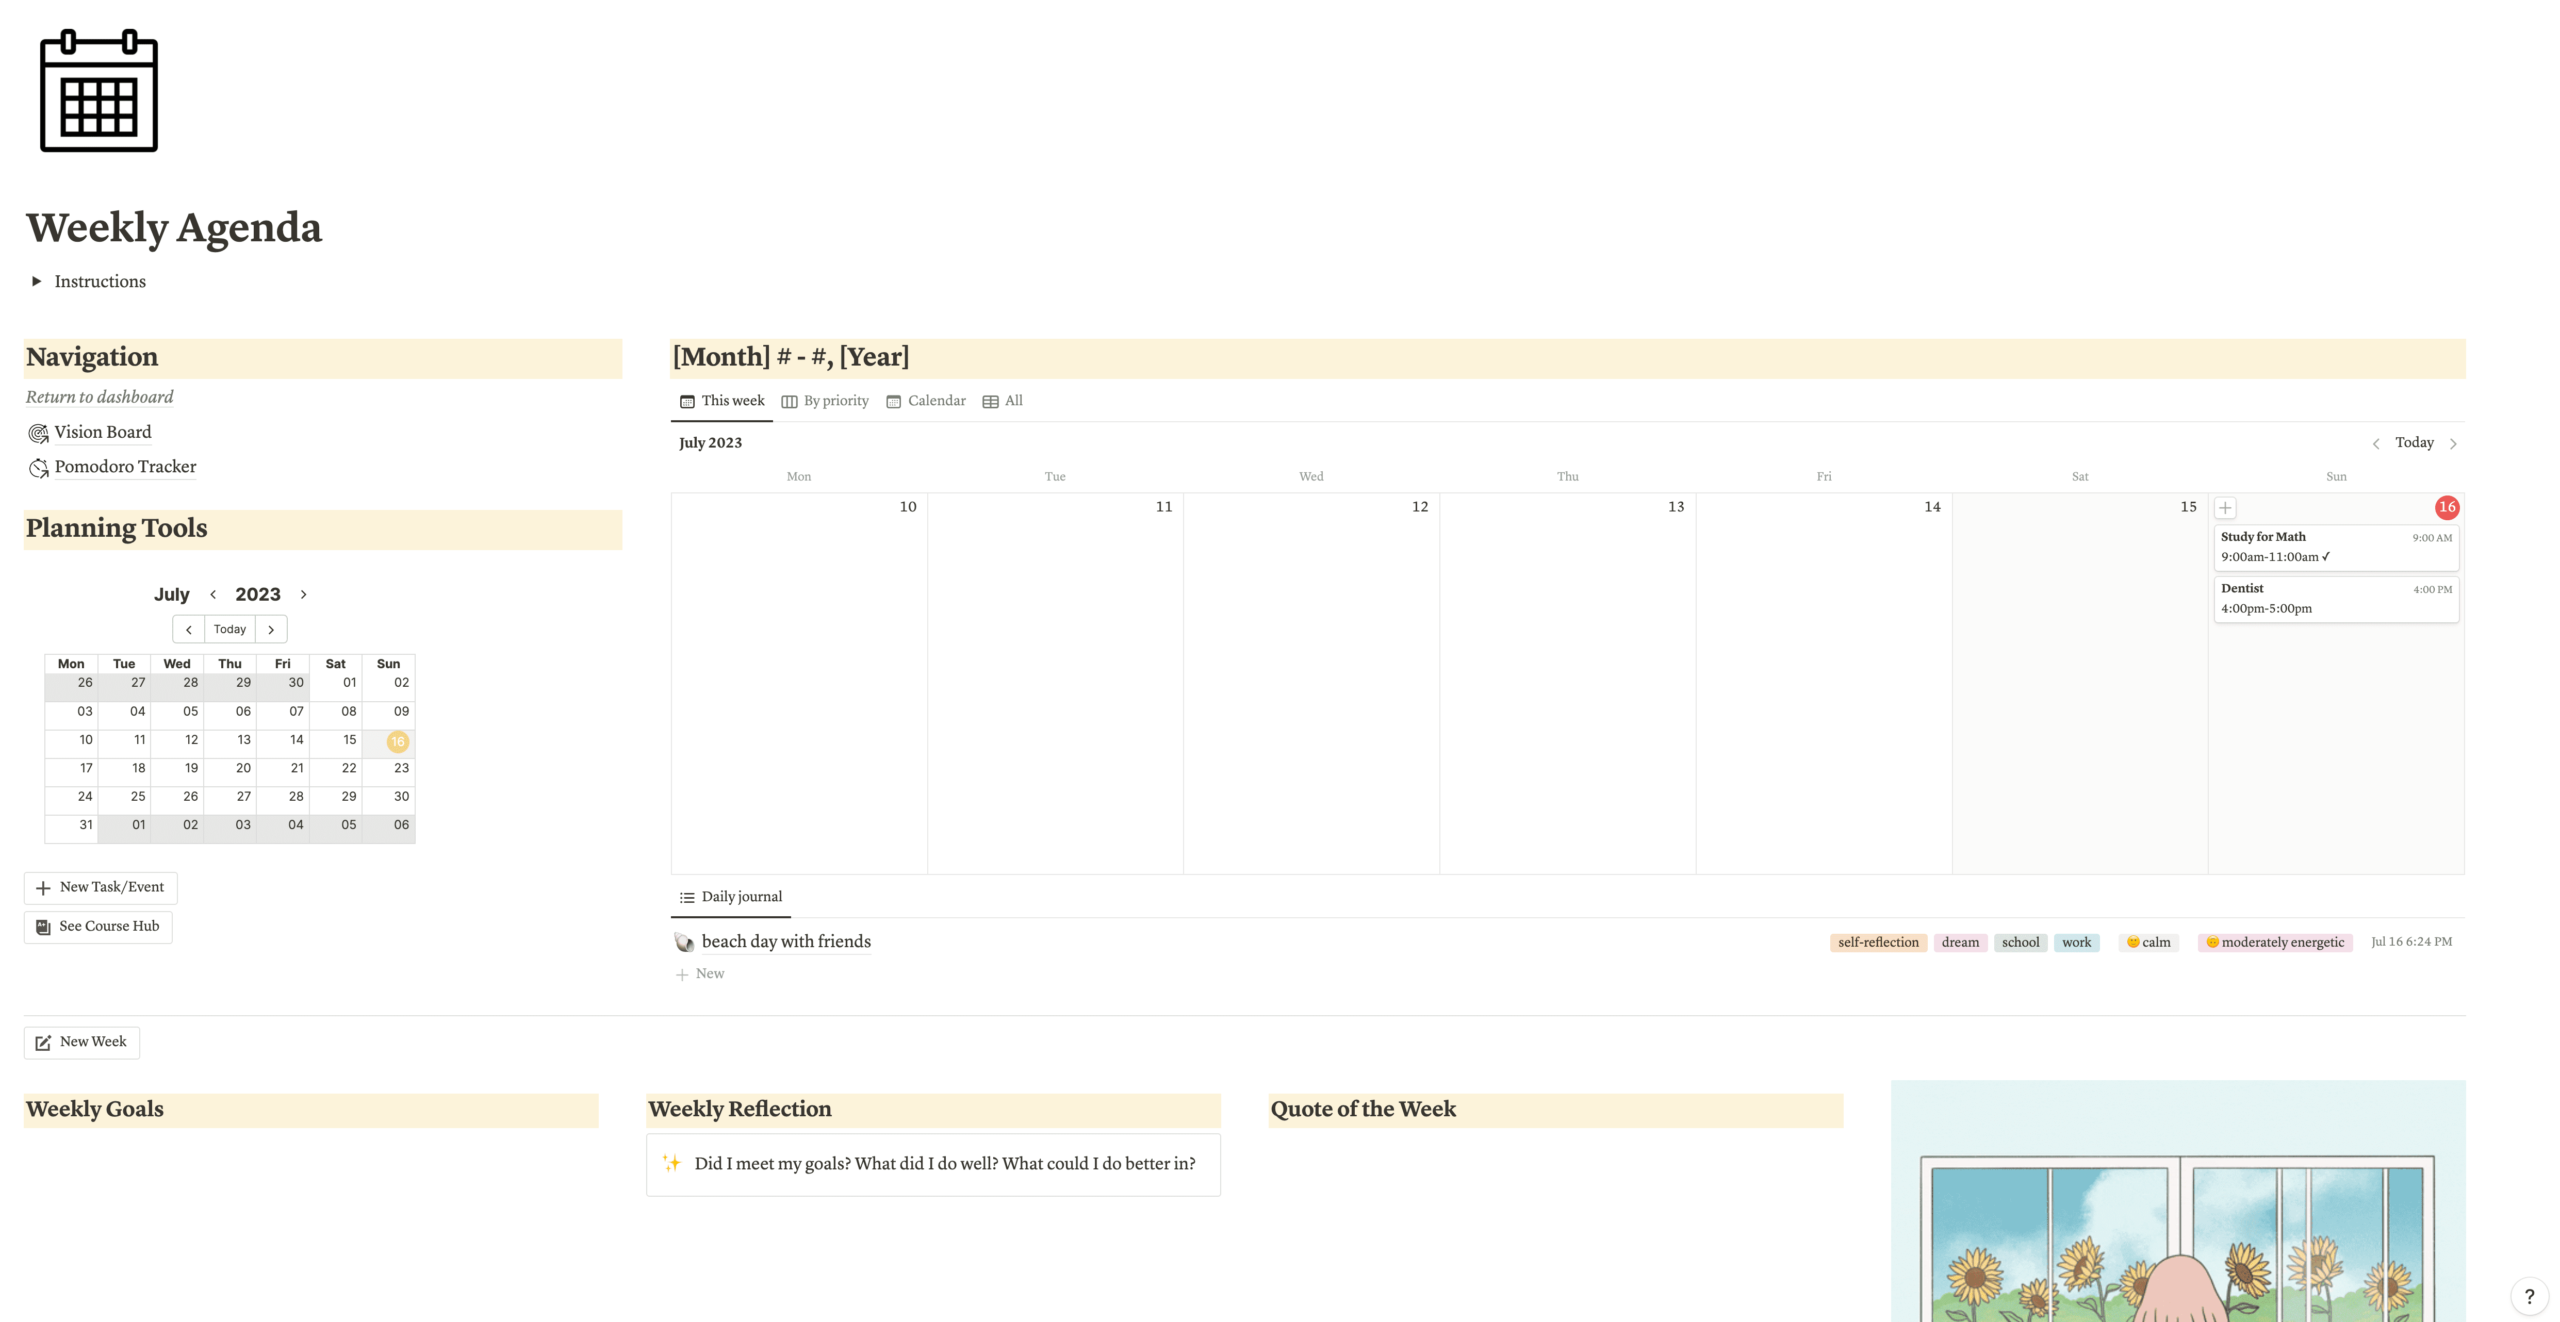
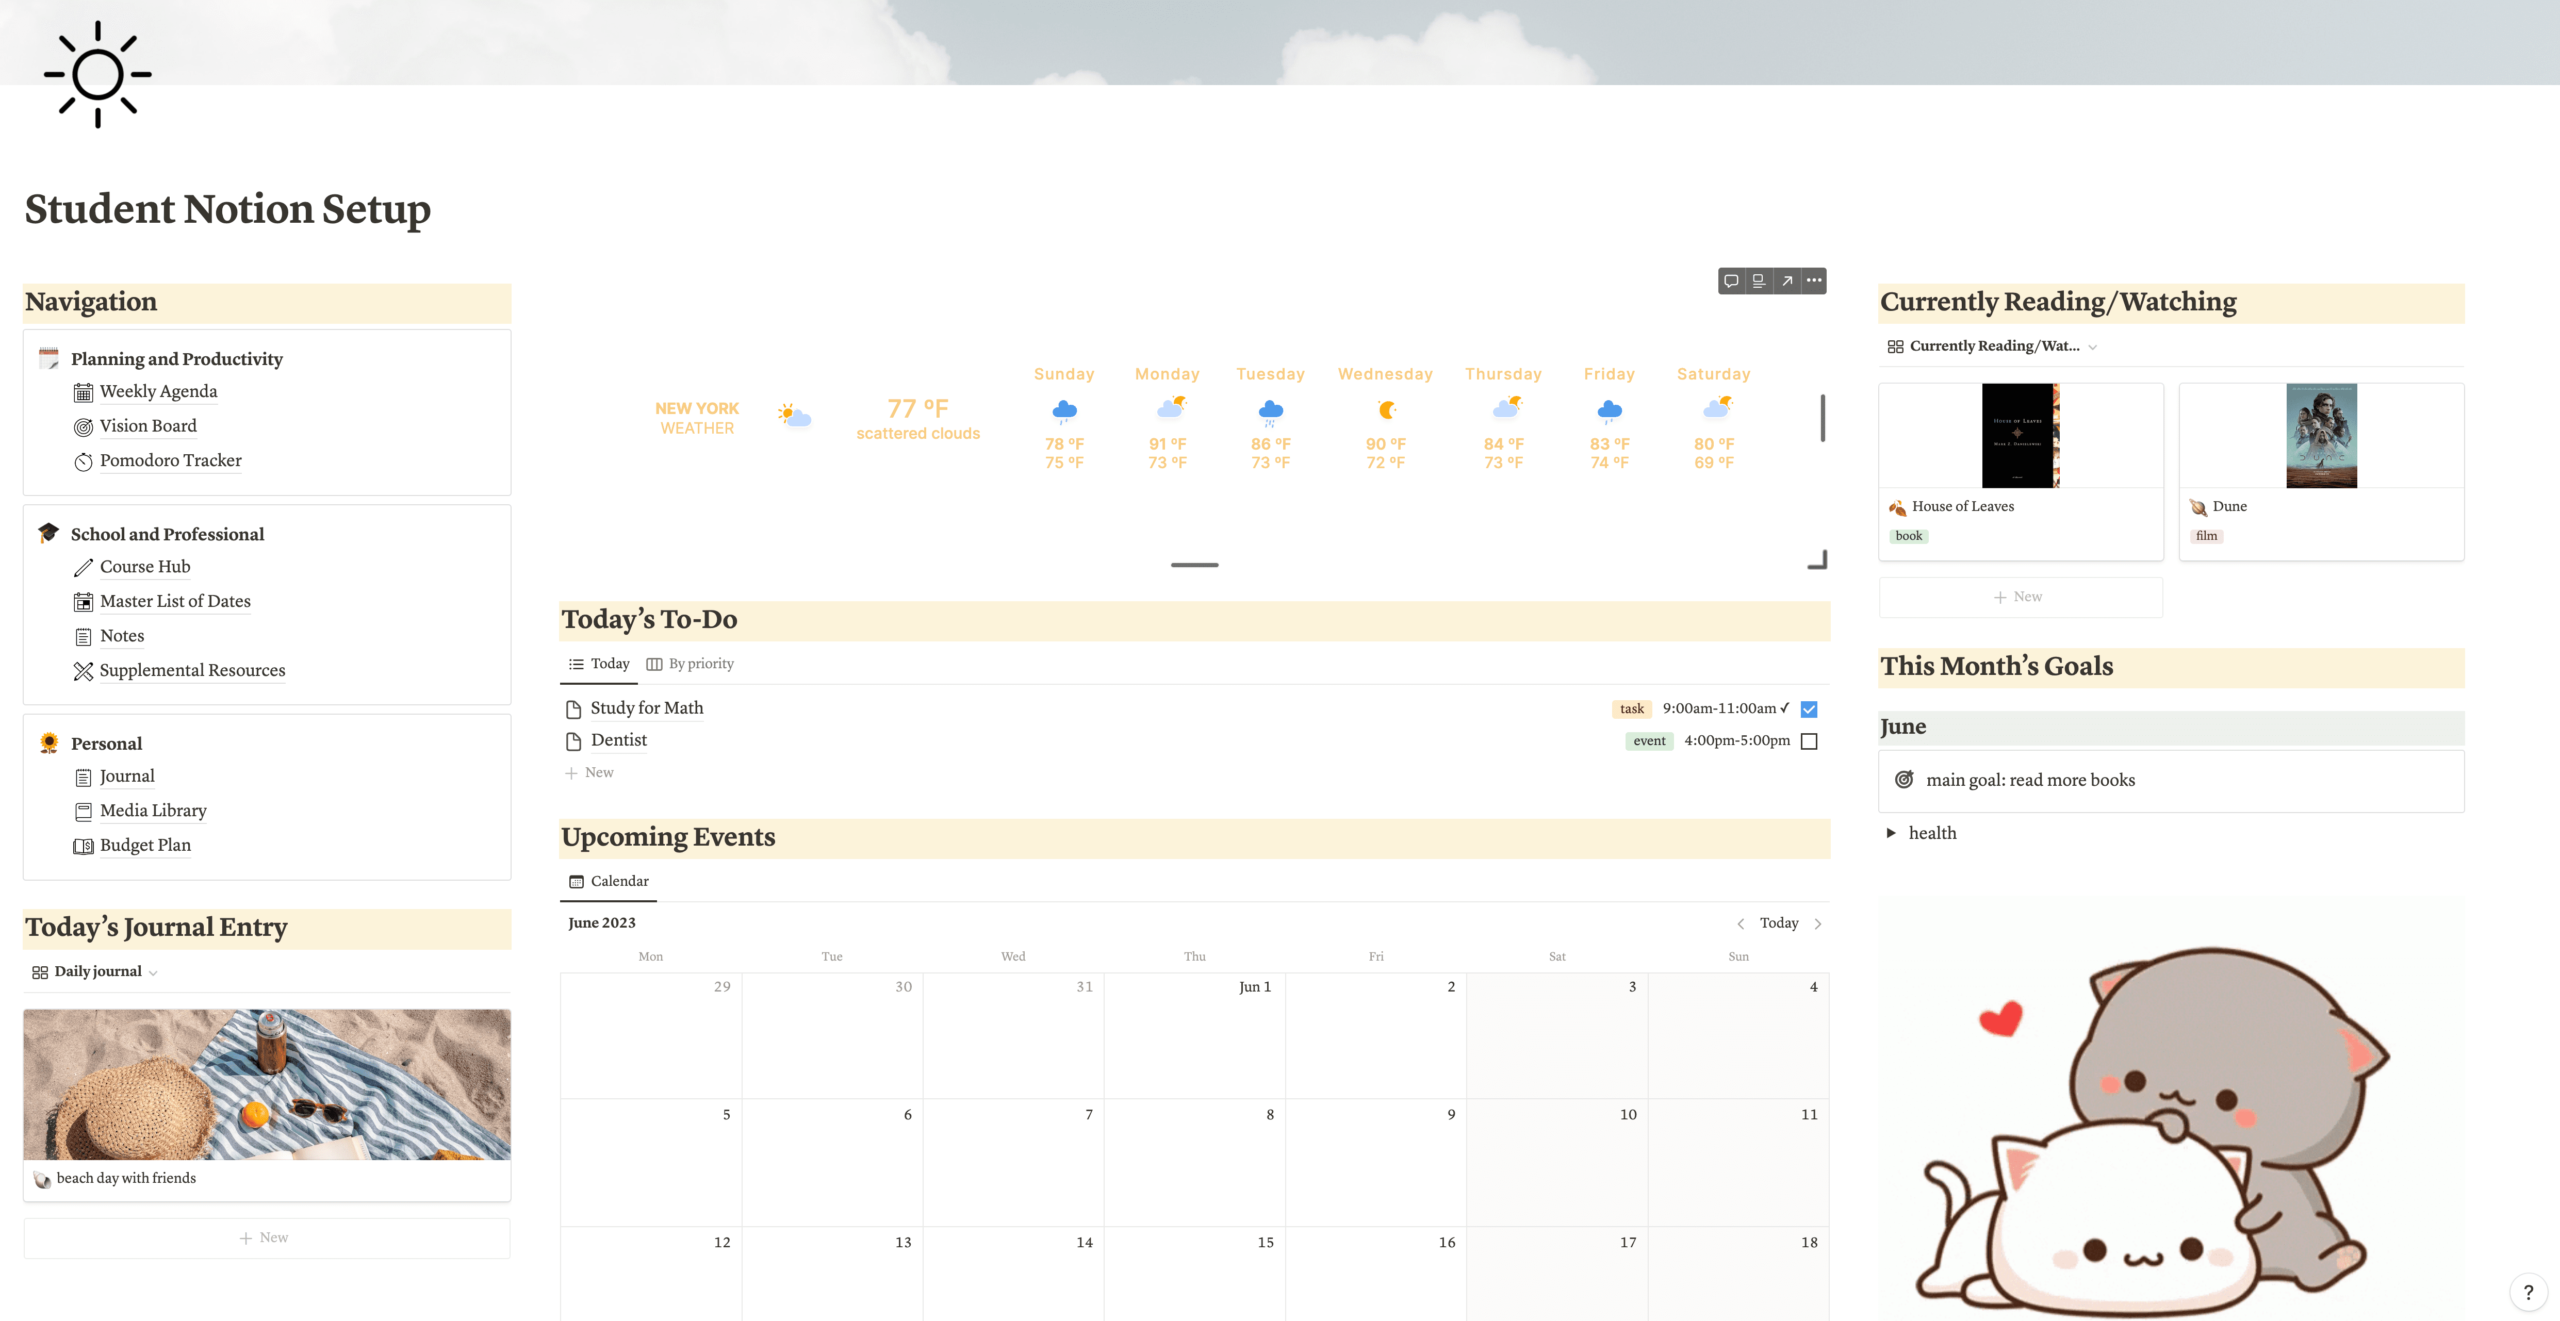
This is the Weekly Agenda page from my student Notion template. As you can see, I’ve embedded a Google Calendar widget in the left sidebar.
You can also move blocks around to create columns and adjust the widths of the columns to your preference.
Databases
Databases are one of the most powerful features in Notion. If you’ve worked with Microsoft Excel or Google Spreadsheets, Notion databases are quite similar.
A database is simply a collection of information. In the image below, you can see a database called Important Dates. I use this database to store (as the name suggests) the dates of assignment deadlines and events. I’ve added various properties (Course, Date, Status, and Tags) to provide more information on each entry.
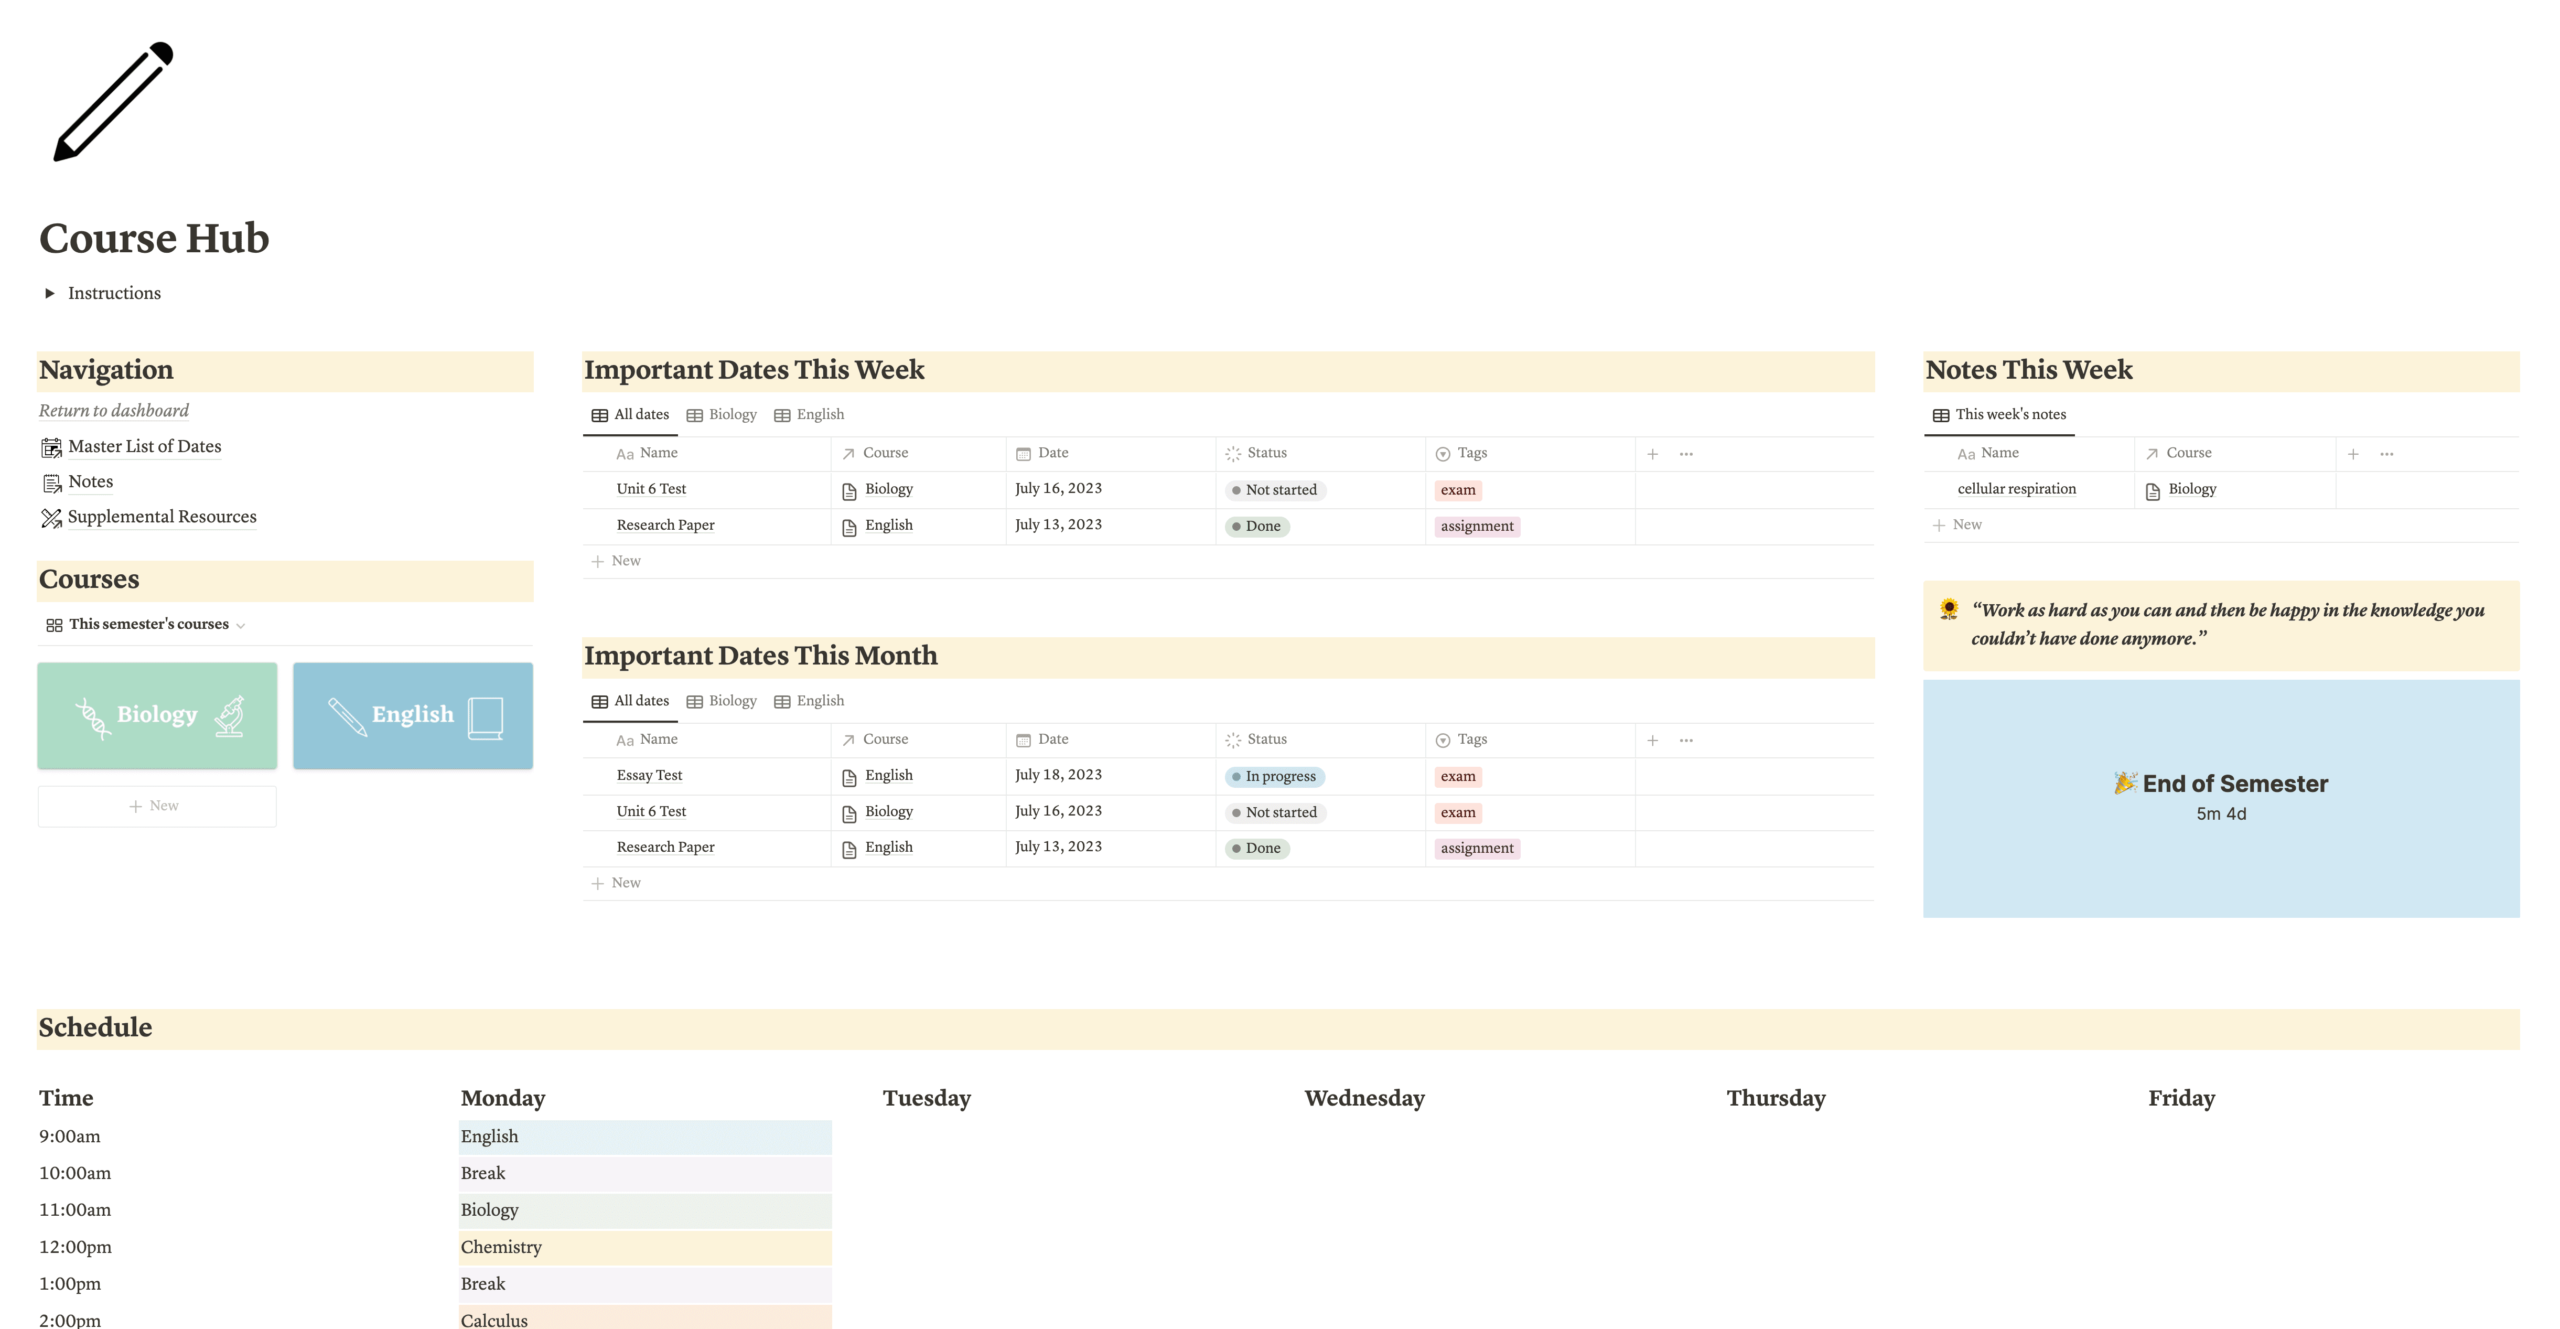
This is the Course Hub page from my student Notion template. In addition to the Important Dates database, it contains 3 other databases: Courses, Notes, and Supplemental Resources (the Supplemental Resources database isn’t displayed on this page). I will discuss these 3 in more depth later on in the post.
Some of the things you can do with Notion databases include:
Display a Database On Whatever Page You Want
Once you’ve created a database, you can display it on any page you want. Simply hit backslash (keyboard shortcut to open up block options in Notion), select your preferred database view, and choose the name of the database you want to display.

Select Different Database Views
Another cool feature of Notion databases is that you can select different views. I’ve provided pictures of each of the database views below.
However, if you want a more in-depth look at each view (and databases in general), I suggest you watch this YouTube video. It’s a bit on the lengthier side but covers EVERYTHING you need to know about databases clearly and concisely.Play
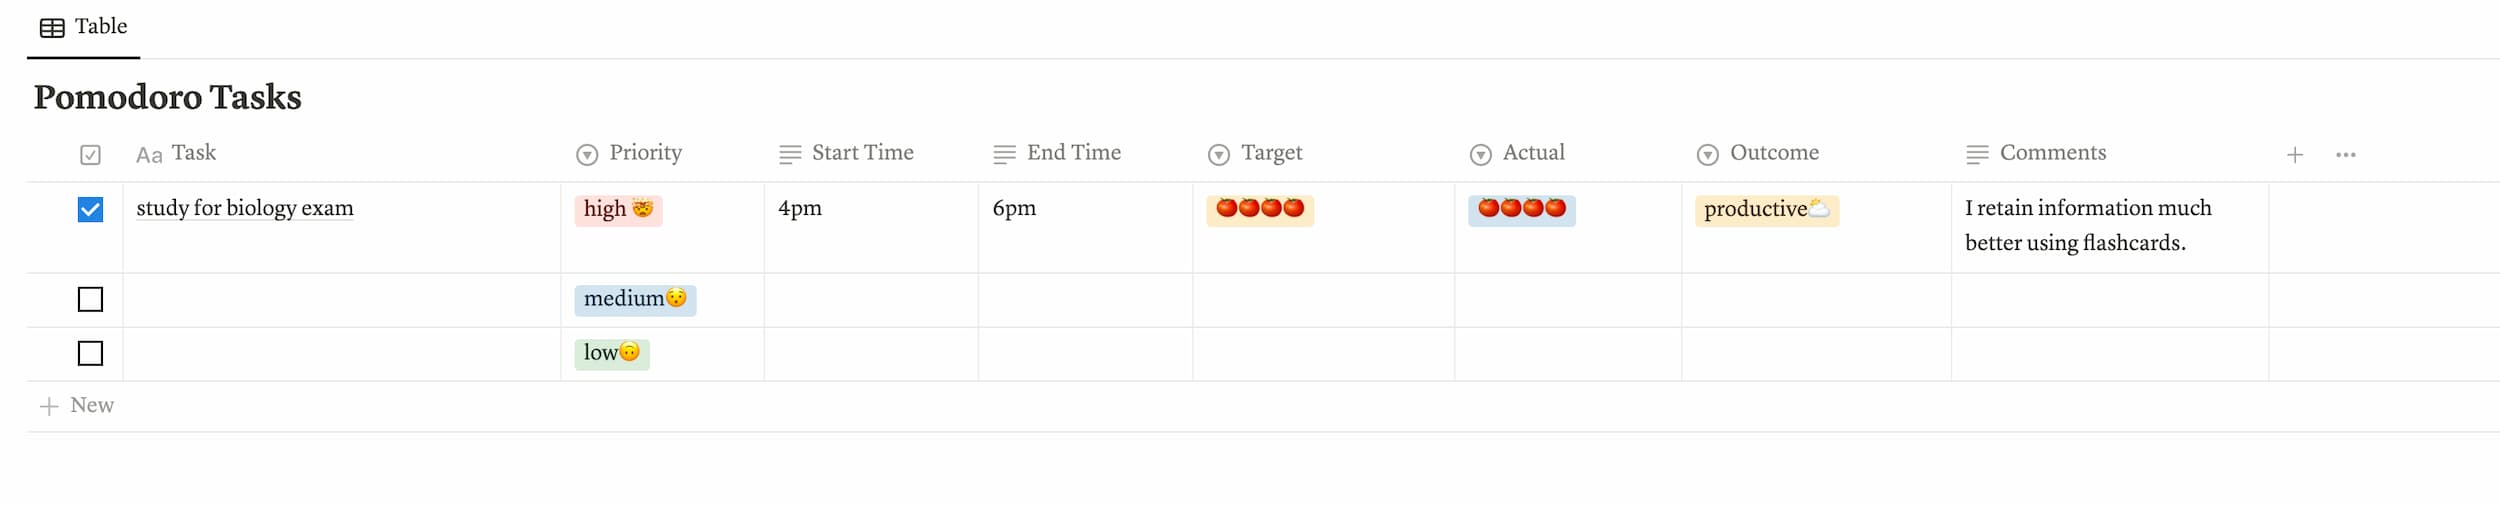
This is an example of the Table view in Notion.

This is an example of the List view in Notion.
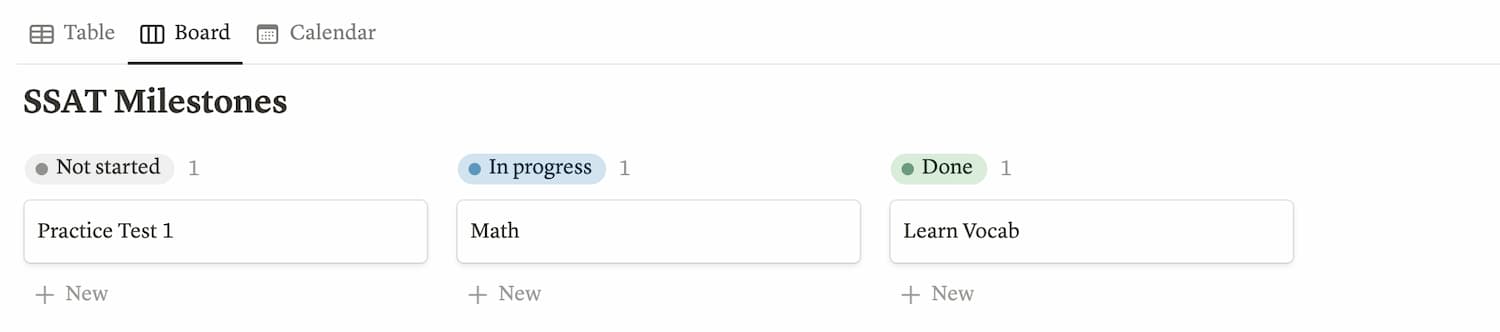
This is an example of the Board view in Notion.
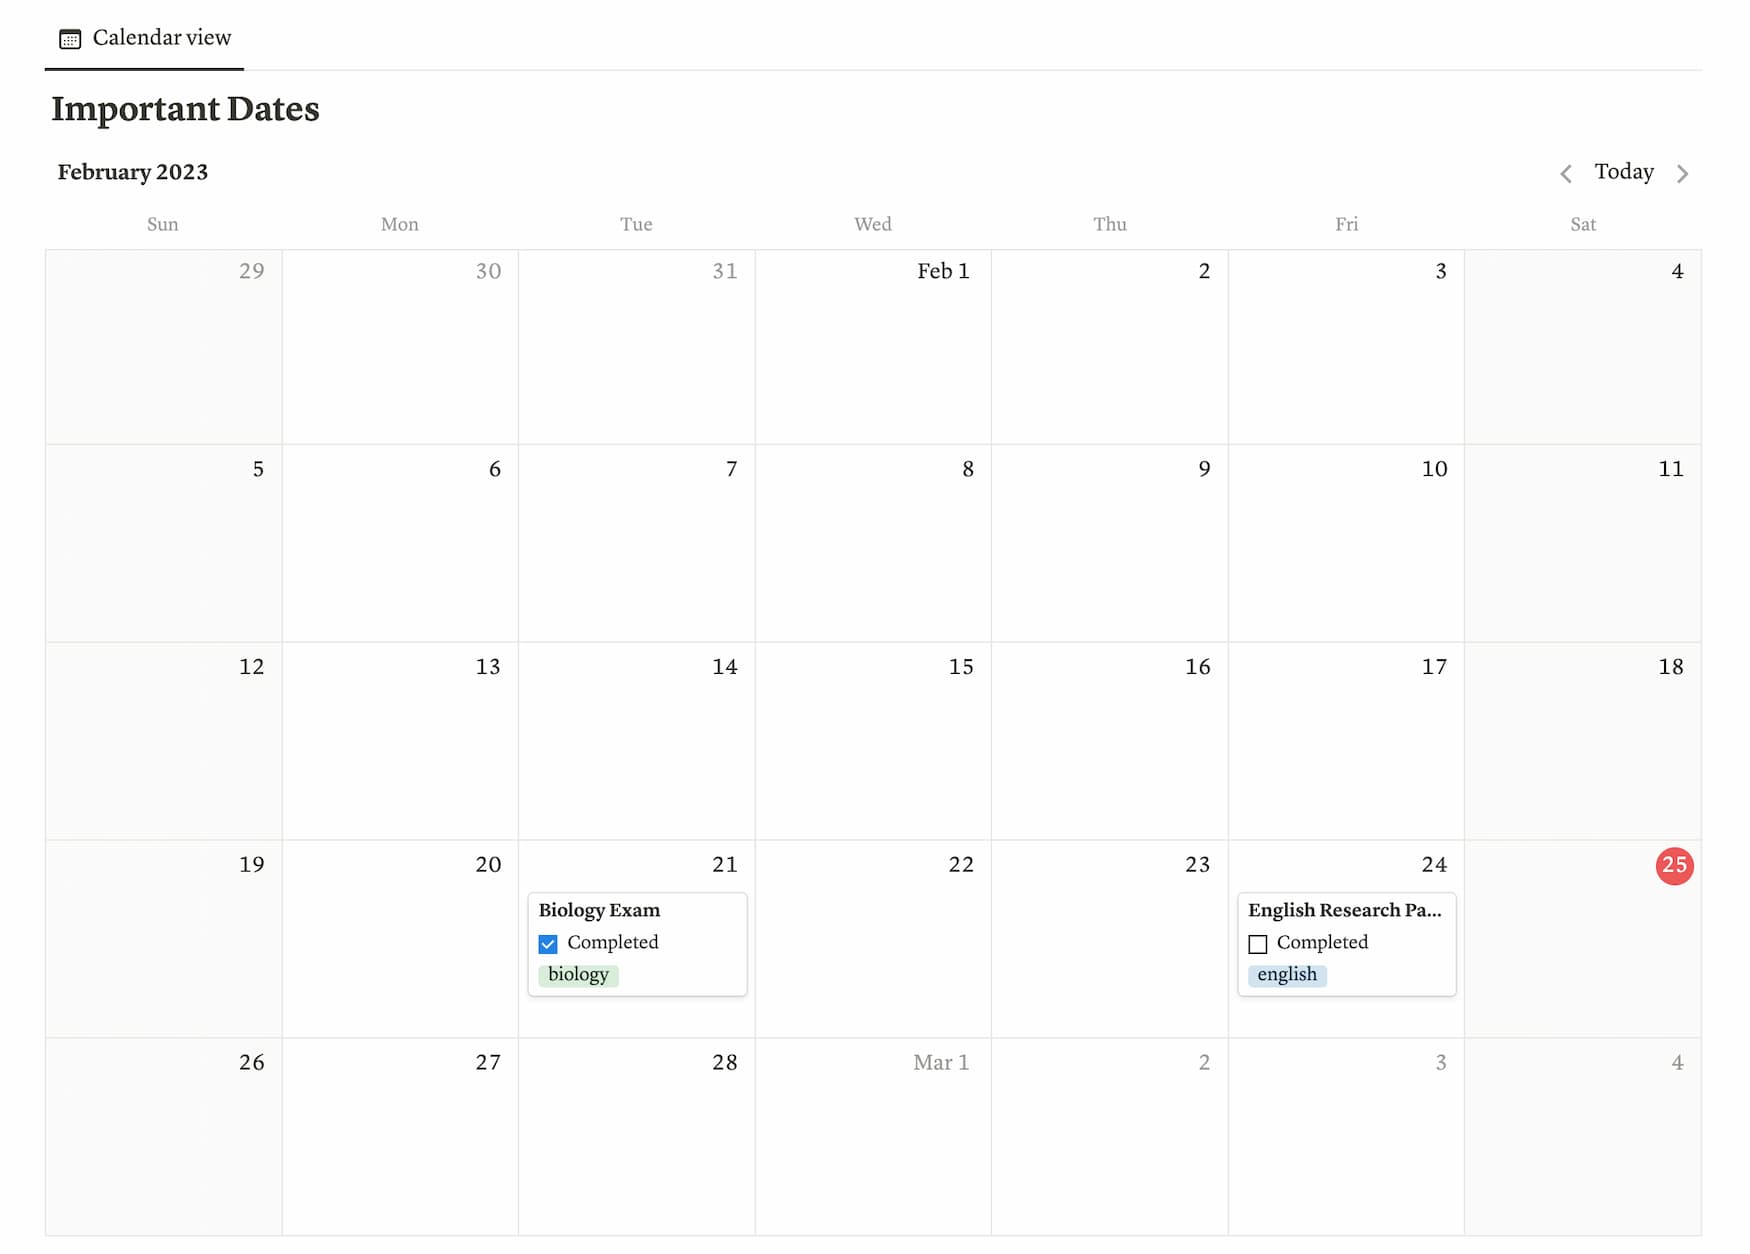
This is an example of the Calendar view in Notion.
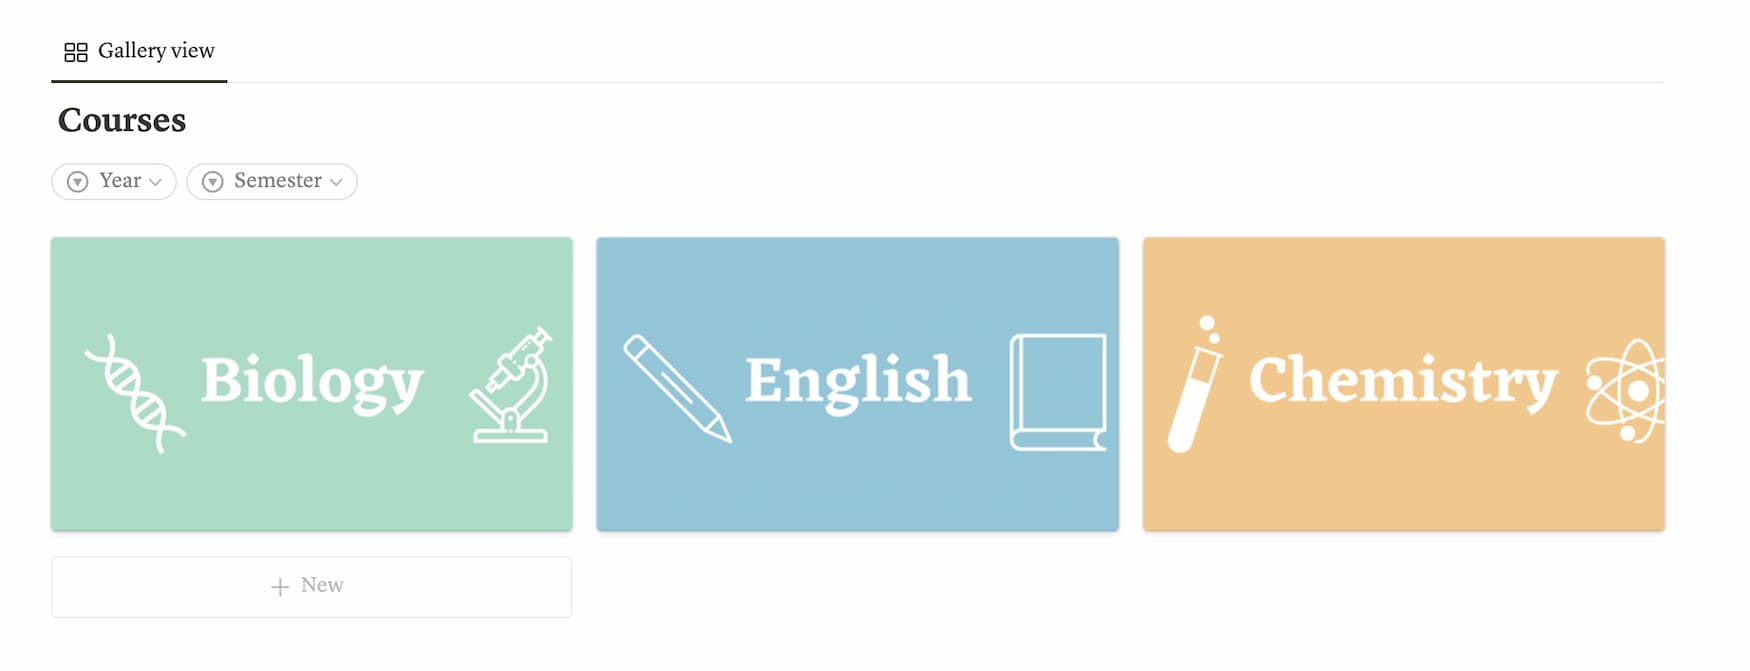
This is an example of the Gallery view in Notion.
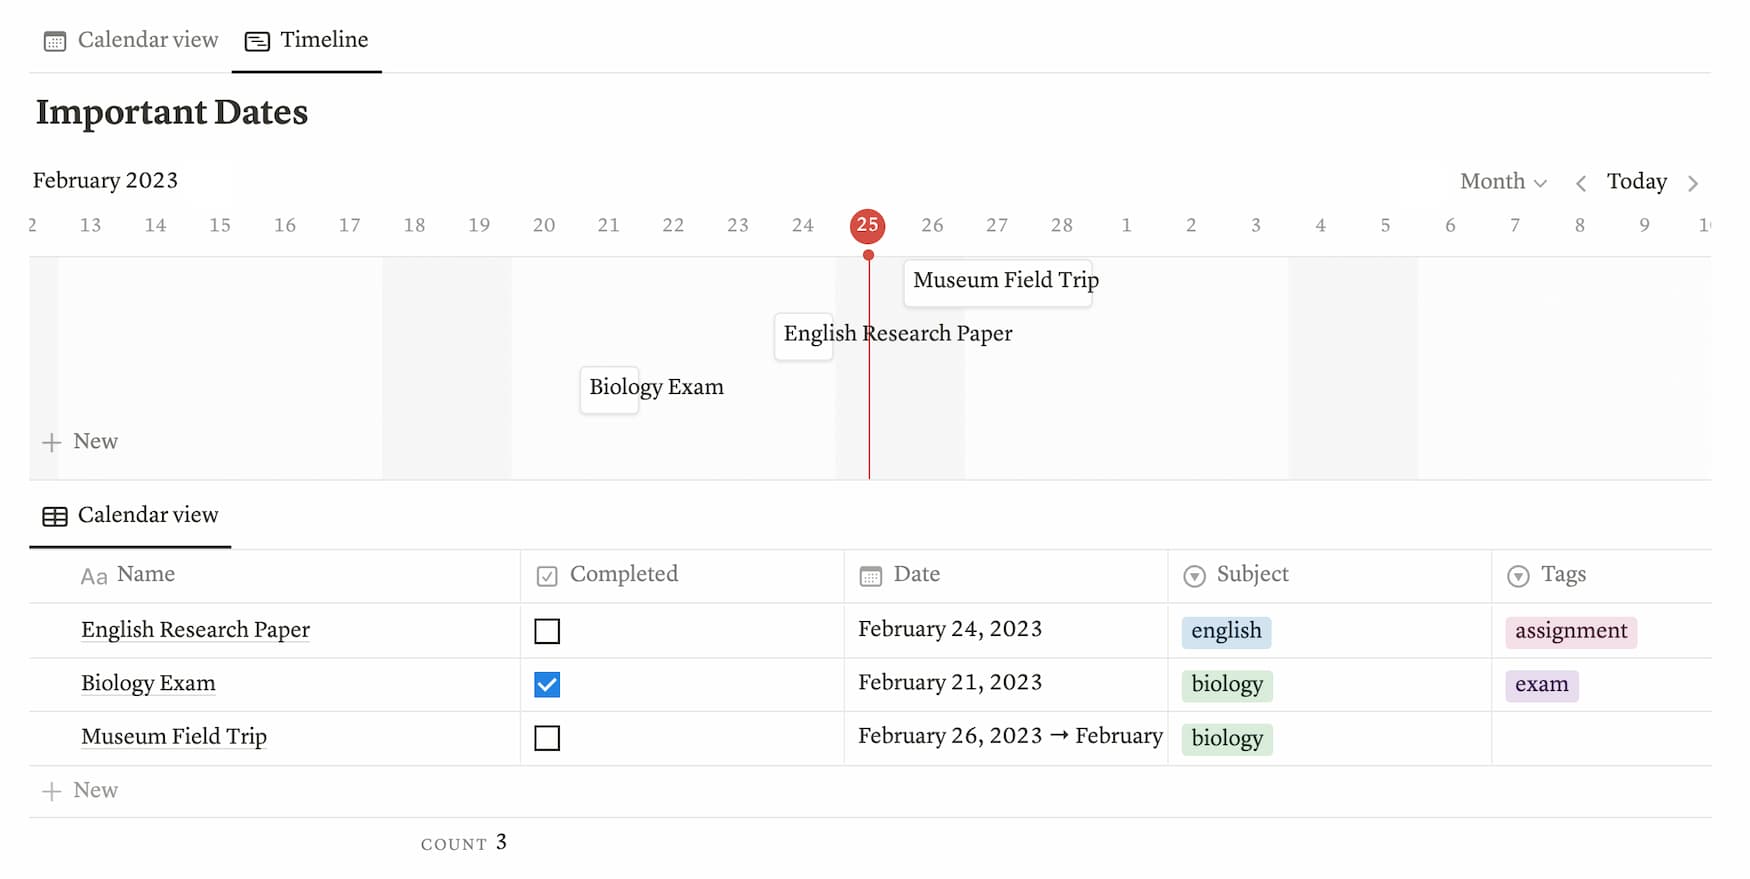
This is an example of the Timeline view in Notion.
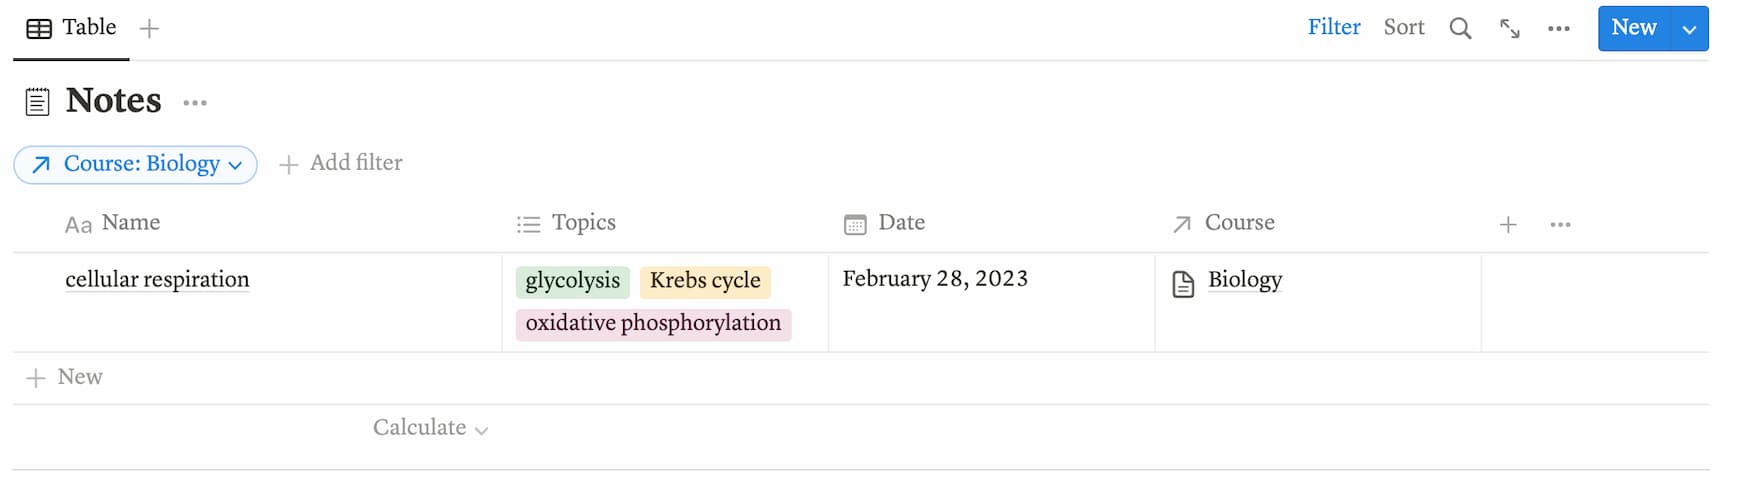
Filter and Sort Database Entries
You can filter and sort databases to only display the entries you want to see. In the Important Dates database I mentioned earlier, one of the properties I set was “Course”.
If let’s say, I only want to view important dates for biology that haven’t passed yet, I can easily filter my database to display that:

I can also sort the entries in order by descending date:

Relate Databases to One Another
In my opinion, being able to relate databases to one another is one of the coolest features of Notion. In my Course Hub, I have a database titled Supplemental Resources, in which I store links to helpful resources.
I’ve set up a relational property with my Notes database (which I use to store notes for all my classes). This way, whenever I add an entry to the Supplemental Resources database, I can choose which Notes entry the resource is related to:

When I head over to an entry in the Notes database, I can see all the resources I’ve linked to it:

Okay, we’ve finally finished covering all of Notion’s main features. Now it’s time to learn about how to use Notion for note-taking!
How Do You Take Aesthetic Notes in Notion?
Notion is designed to be highly customizable, yet simple. As such, it naturally has a clean and aesthetic appearance.
Take a look at my Course Hub page (you can get this page, along with my full student Notion setup by signing up):
On this page, I have a database titled Important Dates, as I mentioned before. I’ve actually placed this database in two places on the page: the one at the top is set to the Calendar view and the one below it is set to the Table view.
To the right of the Important Dates database, I have a Gallery view of my Courses database. Below that, I have a Table view of my Notes database and a link to a subpage containing my Supplemental Resources database.
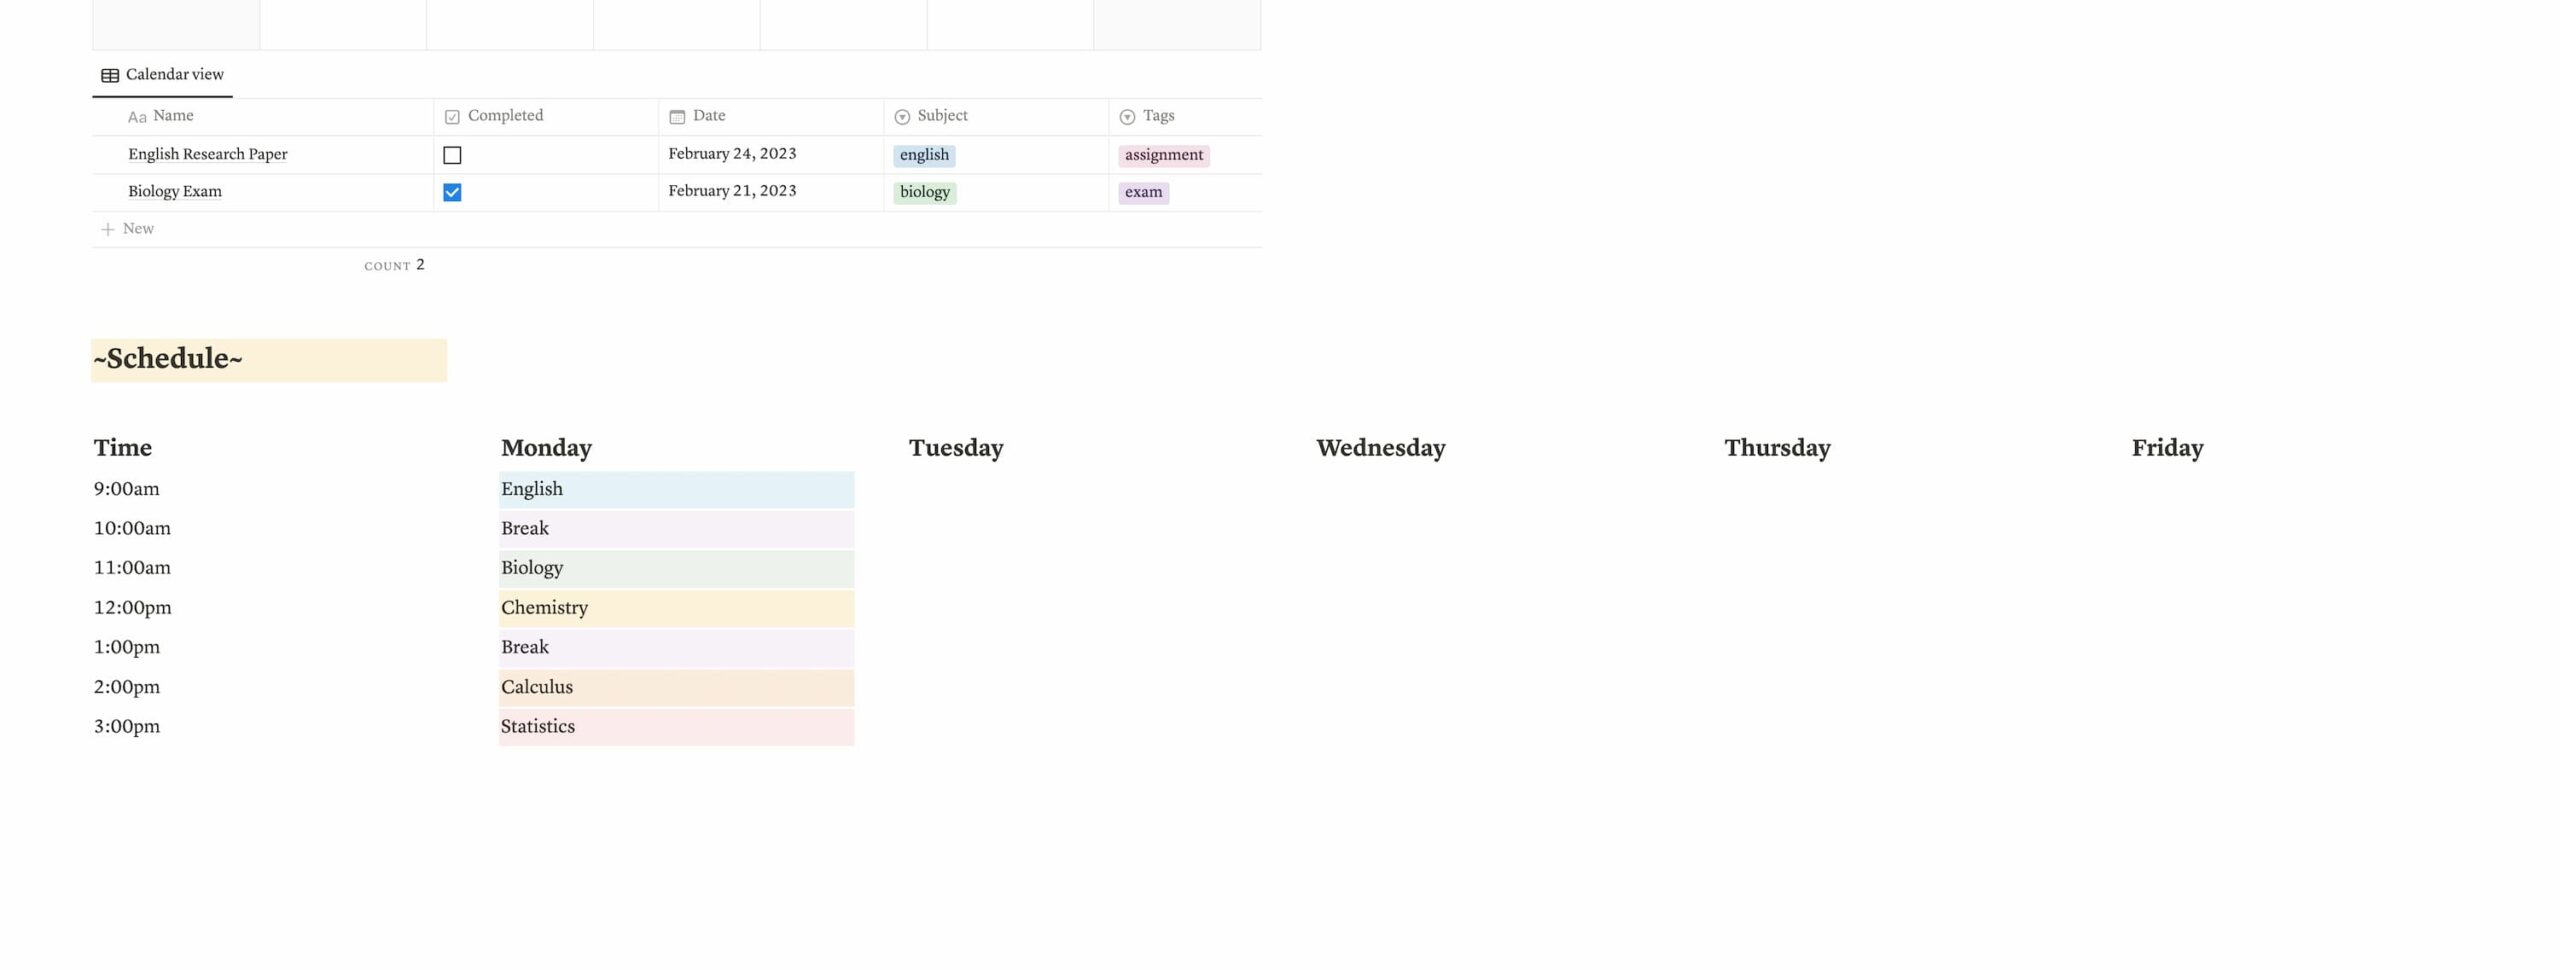
At the bottom of the page, I have my course schedule:
As you can see, it’s quite easy to make your Notion layout organized and aesthetic.
But how do you actually take notes in Notion?
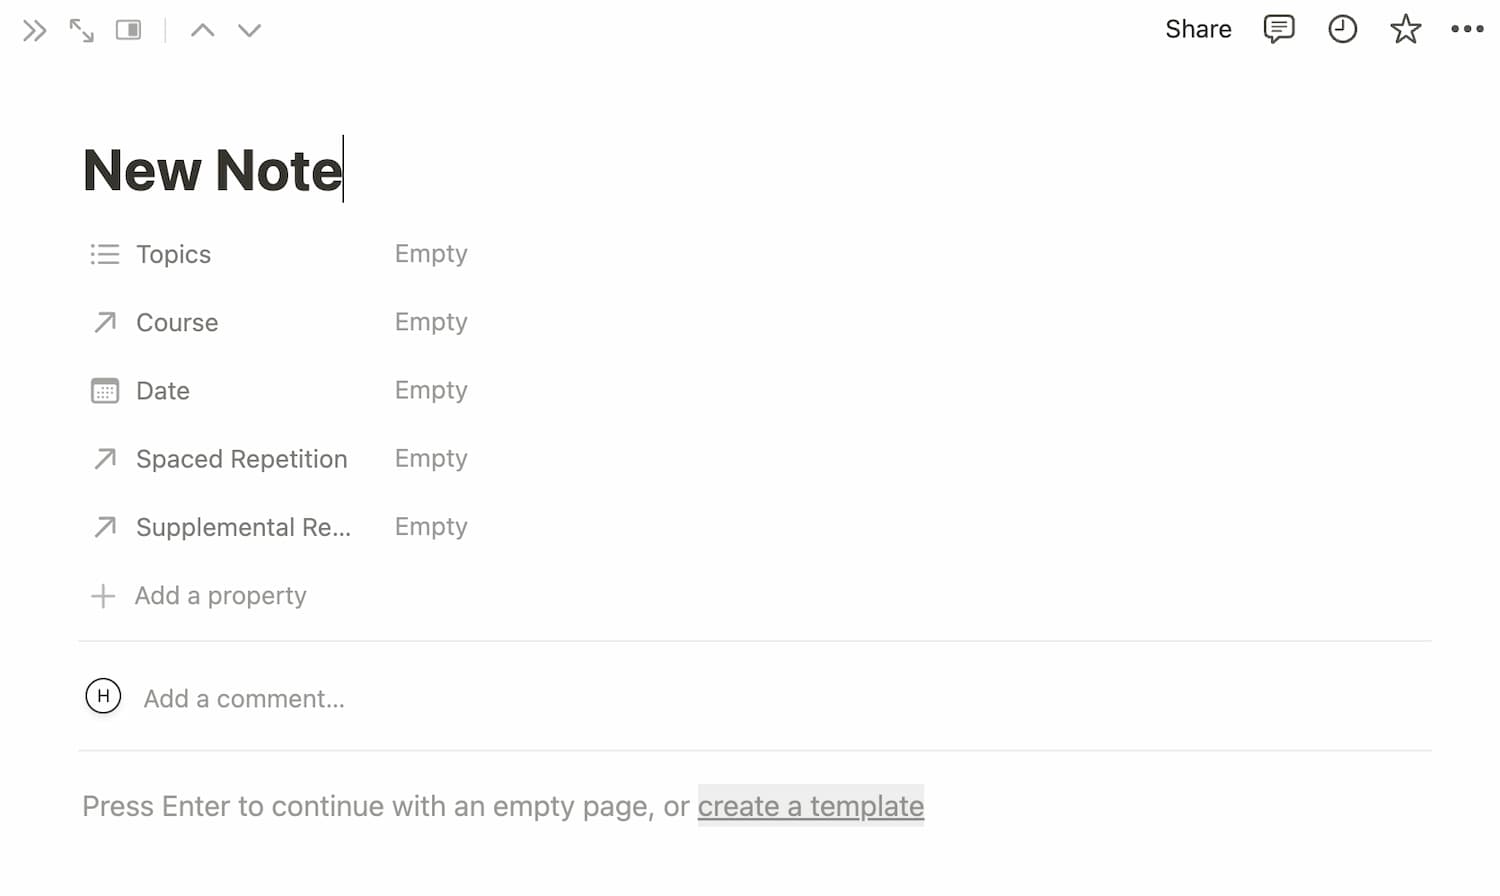
Creating a New Entry
To add a new entry to the Notes database, all I have to do is click the “+ New” button at the bottom, and a new entry opens up.

As I mentioned, each database has properties. For my Notes database, I’ve added the following properties:
- Topics: to tag related topics
- Date: to record the date I added an entry
- Course: to indicate which course the entry is associated with (this is a relational property to the Courses database)
- Supplemental Resources: to link helpful resources for studying (this is a relational property to the Supplemental Resources database)
When you open up the entry, you are taken to a blank page:

Formatting Your Notes
I have a separate post on exactly how to make your Notion aesthetic (even if you don’t have any experience). I suggest checking out it out to get a complete guide on customizing Notion.
In this section, I’ll focus on tips to make your notes look organized and aesthetic in Notion.
Tip #1: Use Headers
When you hit the backslash (remember, this is the keyboard shortcut to open up Notion’s block options), you’ll get the option to select three different headers. Heading 1 is the biggest and Heading 3 is the smallest.
Remember to divide your notes into sections and subsections using these heading options
Tip #2: Use Different Colors
You can change the background color or text color of a block by clicking on the six dots to its left-hand side.

Tip #3: Play Around With Different Blocks
Notion’s blocks are very versatile, and you should use them to your advantage when taking notes.
Here are some blocks I use frequently in my notes:
- Image block: for embedding diagrams and other visuals to enhance my understanding
- Web bookmark: for linking to a helpful website
- Callout/quote: to bring attention to a section of text
- Subpage: to detail a subtopic extensively without cluttering up the page
You can see all of these blocks in use in the image below:

Tip #4: Use Toggles
I cannot stress how important it is to use toggles when taking notes. Organizing your notes into toggles is key for active recall.
Did you know that common studying methods like rereading notes and highlighting are ineffective? These methods are passive and don’t enhance your understanding or retention.
In contrast, active recall is one of the most effective study methods because it forces you to retrieve information on your own. Instead of simply rereading your notes, you must pull information from your existing knowledge base. Examples of active recall include:
- Doing practice problems
- Using flashcards
- Creating mind maps
Studies show that students who use active recall score higher grades.
So how do Notion’s toggles play a role in this? When taking notes, I organize my text into toggles. I label these toggles with questions to ask myself when studying:

Click here for a complete guide on how to make your Notion aesthetic.
When I go back to study my notes, I force myself to recall the information on my own before viewing the answer.
How Do I Create a Note-Taking Template in Notion?
This is a common question I see floating around online. In Notion, you have the ability to create templates for database entries.
For example, I follow the same checklist for every blog post that I write. It’s a very lengthy checklist so copying and pasting it from somewhere every time would be very inconvenient.
Instead, I’ve stored my checklist in a template. Every time I add a new entry to my Blog Post database, I can populate the entry with the checklist with a single click:

To create a template, open up a new entry in your Notes database. Then, click on “create a template”. Title the template, then add your template content to the page.
When you go back to your entry, you’ll have the option to click on the template and populate the entry with it. This one feature is super effective for keeping your notes consistently formatted while saving time!
How to Organize Notes in Notion
Now that we’ve finished covering how to take aesthetic notes in Notion, we need to cover how to organize notes.
In this section, I’ll be walking you through step-by-step on how I organize my notes in Notion.
Notes Database
As you’re probably already familiar with, I use a Notes database to store notes for all my classes. I have a Table view of this database on my Course Hub main page.
Every time I want to add a new note, I can just add an entry to this database and fill in the following properties:
- Topics
- Date
- Course
You can filter the Notes database to only display notes related to specific topics, notes taken on a specific day, or notes for a particular subject.
Courses Database
As I mentioned, I have a Courses database for storing information on all my classes. The properties I’ve set up for this database are as follows:
- Professor
- Semester
- Year
I’ve also created a template for this database. That way, every time I add a new course, I can populate it with the necessary information with one click.
In my template, I have the following:
- A section to embed the course syllabus.
- A Table view of the Important Dates database from the Course Hub main page. I’ve filtered it to only display entries for the corresponding subject.
- A Table view of the Notes database from the Course Hub main page. I’ve filtered it to only display entries for the corresponding subject.
- A Table view of the Supplemental Resources database from the Course Hub main page. I’ve filtered it to only display entries for the corresponding subject.
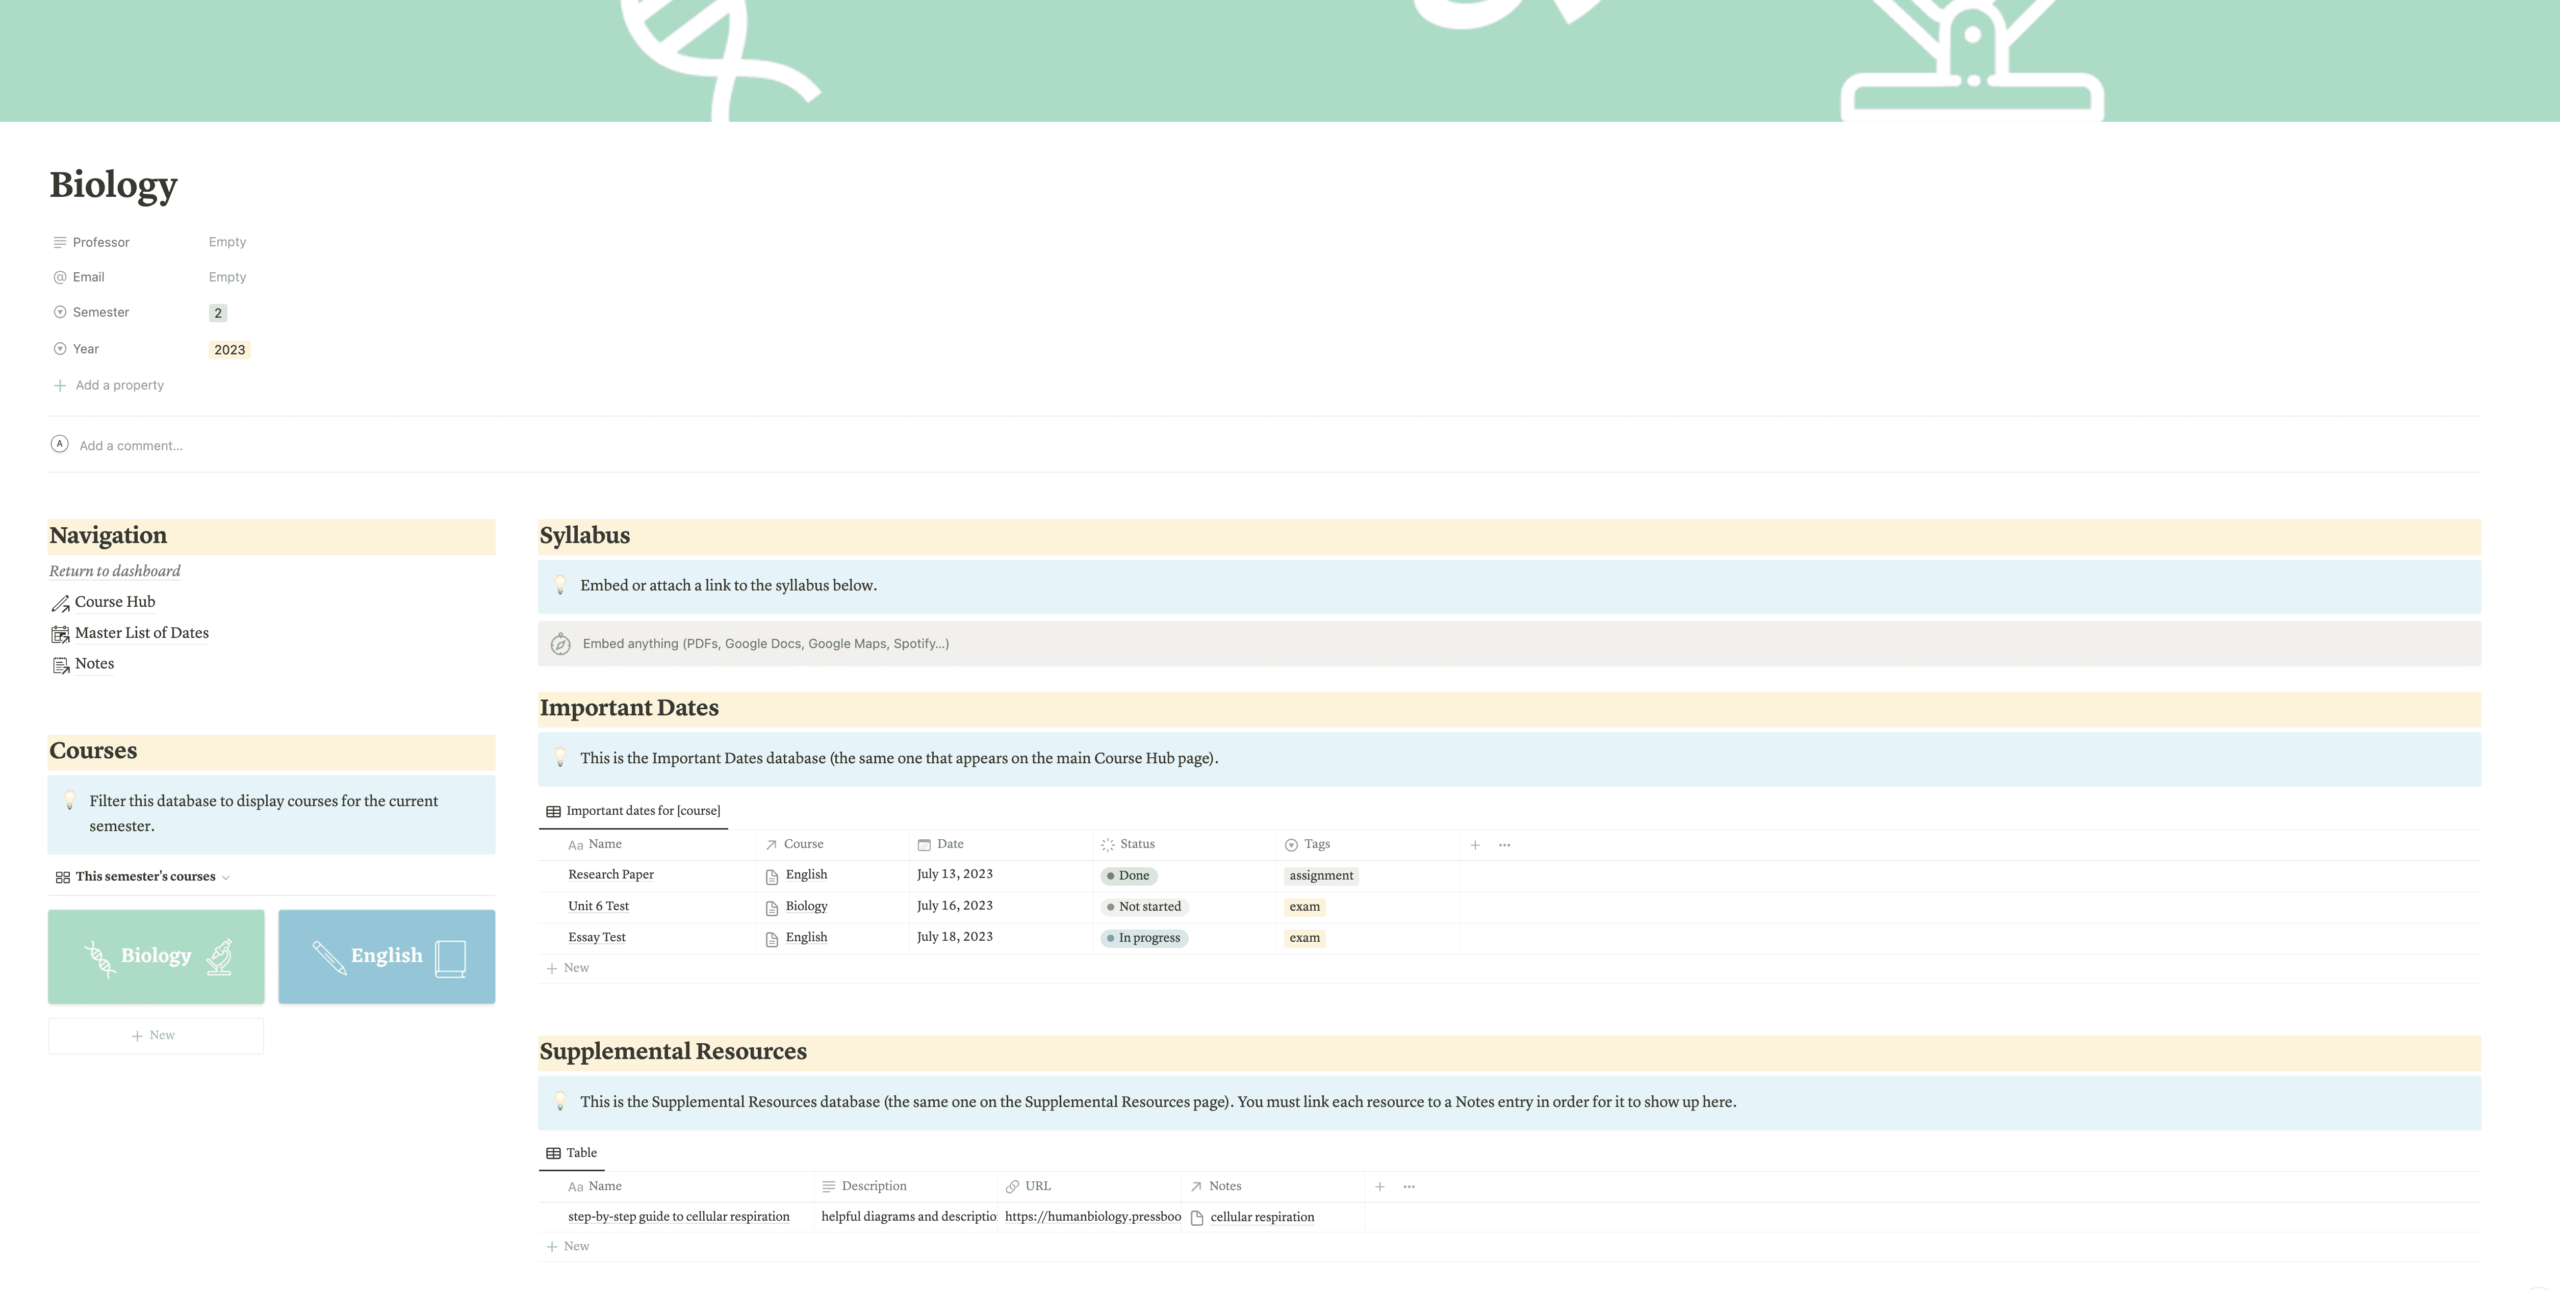
The Notes database database isn’t displayed above.
I can add notes directly to the Notes database view within each course in my Courses database. Each view is filtered to display notes for the corresponding subject. As a result, when I add an entry to the Notes database, the entry is automatically assigned to that particular subject.
For example, if I open up Biology in my Courses database and add a new entry to the Notes database in it, that entry will automatically be assigned “Biology” as its Course property (remember, the Course name is one of the properties associated with entries in the Notes database).

I just added a new note titled “photosynthesis” to the Notes database view in Biology. The view is filtered to display only notes associated with Biology.
If I return to the Course Hub main page, you can see that the new entry I’ve added is indeed assigned Biology as its Course property:

Taking Your Note-Taking to the Next Level With Notion
I mentioned at the beginning of the article that I would explain how to use Notion to improve your retention. That’s what this section is all about.
Spaced Repetition
Do you ever feel like you have trouble recalling what you learned… right after you learned it? Well, it turns out that this is something pretty much everyone experiences.
In the late 1800s, psychologist Hermann Ebbinghaus came up with the forgetting curve, a model of the amount of information we retain over time.
According to this article, “Research on the forgetting curve shows that within one hour, people will have forgotten an average of 50 percent of the information you presented. Within 24 hours, they have forgotten an average of 70 percent of new information, and within a week, forgetting claims an average of 90 percent of it.”

So how exactly can you combat this trend of forgetting? One of the most effective solutions is spaced repetition. This involves reviewing information periodically after you’ve learned it.
You should review notes you’ve just taken the very next day. Then, you should review them again a week later. After that, you can review them two weeks later, and so on. You can increase the interval between consecutive review sessions each time.
According to this 2017 study from PubMed Central, spaced repetition enhances memorization and increases the rate of learning. It’s much more effective than massed learning, which involves trying to review everything in one go (likely the night before the test—I’ve been guilty of this before…).
How to Use Notion for Spaced Repetition
Spaced repetition can feel like a hassle. You have to record the date you last studied a topic, determine the next review date, and then remember to review on that date.
Fortunately, you can automate all of this in Notion! Again, we will be leveraging the power of Notion databases.
Setting Up a Spaced Repetition Database
First, you need to create a new database titled Spaced Repetition. Then, add the following properties:
- A relational property to the Courses database so you can select which course the spaced rep session is for.
- A relational property to the Notes database so you can select which notes the spaced rep session is for.
- The date that the topic was learned.
- Dates for reps #1 – #4 (or however many spaced rep sessions you need).
- A formula property (Next Rep) that displays the next date based on the date of your previous review session.
Here is the Spaced Repetition database I’ve created:

As you can see, when I fill in the date of the 1st rep, the Next Rep property automatically fills with the date of the next review session! This is because I added a formula that takes the values of the other properties to automatically calculate the next date.
According to computer researcher Piotr Wozniak, who created SuperMemo (an algorithm that determines when to do spaced rep sessions), the best spaced rep intervals are:
- 1st rep: 1 day after the date learned
- 2nd rep: 7 days after the date learned
- 3rd rep: 16 days after the date learned
- 4th rep: 35 days after the date learned
I’ve set up my Spaced Repetition database to calculate the next review date based on these guidelines.
Setting Up a Spaced Repetition Template
Additionally, I’ve set up a template within the Spaced Repetition database to reflect on each review session.
Here is what it looks like:

Using this template, I can reflect on what I did well on and what I struggled with. That way, during the next review session, I can focus on my main weak points.
The cool thing about having a Spaced Repetition database is that I don’t have to worry about forgetting to review a topic. I like to plan my weeks ahead of time. At the beginning of each week, I take a look at my Spaced Repetition database, then write down the topics I need to review each day in my weekly agenda.
FAQ
Is Notion Free to Use?
Yes! The free plan is sufficient for personal use and provides you with unlimited blocks. You can sign up now at notion.so.
Can I Take Handwritten Notes in Notion?
Personally, I prefer typing my notes in Notion because I like using the toggle feature for active recall. However, if you want to upload handwritten notes to Notion, you totally can.
You can simply take pictures of your handwritten notes and add them via the Image block. Or, you can scan your notes into PDF files and embed them in Notion.
Which is Better: Notability or Notion?
I used Notability for years before switching over to Notion. Here were the features of Notability I liked:
- I could export files and mark them up.
- I could upload images.
- I could organize my notes into folders.
- I could resurface notes by entering keywords in the search bar at the top.
Although I like Notability (and still use it when I need to mark up files), I now use Notion as my main note-taking app. In my opinion, Notion provides several features that give it a leg over Notability:
As I’ve discussed extensively, Notion’s databases are very powerful. I can filter and sort them based on what entries I want to see and in what order. Also, I can relate databases to one another. As you saw with the Spaced Repetition database, I’ve even been able to automate my study schedule.
Also, Notion provides the ability to configure templates, which saves a ton of time. I’ve created a template for my Courses database, so I can populate each new course with the necessary information with a single click. I’ve also created a template for my Spaced Repetition database, so I can reflect on my performance during each review session.
Last but not least, Notion is an aesthetic note-taking app. Notion’s clean layout makes it very visually pleasing. It’s kind of like having a personal website to store all your notes (and organize the rest of your student life!).
Is Notion the Best Aesthetic Note-Taking App?
Notion is undoubtedly one of the best note-taking apps today. It makes it easy to:
- Take and organize notes efficiently
- Resurface notes when you need them
- Improve understanding and retention (through active recall and automation of spaced repetition)
- Create an aesthetic layout (because of how customizable yet clean its layout is)
If you want to start using Notion for note-taking, make sure to check out my student Notion template. It contains not just my Course Hub, but pages to organize your entire student life!
Will you be using Notion for note-taking? Let me know in the comments below! Also, feel free to leave any questions you have about Notion, and I will do my best to answer them.
For more on Notion and productivity, check out:
- Easy Time Blocking Method for Students Using Google Calendar
- How to Plan Your Week as a Student and Stick to Your Plan
- The Best All-in-One Aesthetic Planner App for Students
- How to Create an Aesthetic Notion Setup With Zero Experience
- How To Set Up Notion For Students (+FREE Aesthetic Template)
- How to Wake Up at 5am to Study—Tips From a Former Night Owl
- How to Get Your Life Together as a Student


I love Notion so relatable.