When you first get started with Notion, it might feel overwhelming. You’ve probably seen lots of aesthetic Notion setups but have no idea how to get started.
I felt the same way when I first began using Notion. I watched several YouTube videos and read various articles to learn about how to customize my setup. Since then, I’ve discovered even more features to customize my Notion setup.
In this post, I’ve condensed everything I’ve learned into a complete guide on how to create an aesthetic Notion setup. At the end, you’ll also find a free aesthetic Notion template for students.
Let’s jump right in!
Choose a Color Scheme and/or Aesthetic
To keep everything visually cohesive, it’s important to choose a color scheme or aesthetic. Once you’ve chosen, you should stick to similar colors and styles when choosing icons, page covers, widgets, etc.
If you’d like to stick to a consistent color scheme, Coolors provides a color palette generator. You can also check out their trending palettes here.
My personal favorite graphic design website is Canva, and they also provide a color palette generator.
Sticking to a certain aesthetic also makes your Notion setup more visually appealing.
Here is a list of various aesthetics for inspiration:
- Light academia
- Dark academia
- Cottagecore
- Royalty core
- Studio Ghibli
- Kawaii
- Vaporwave
- Cityscape

You can even create your own aesthetic based on a favorite book, TV show, or other form of media.
Customize the Basic Page Appearance
General Appearance
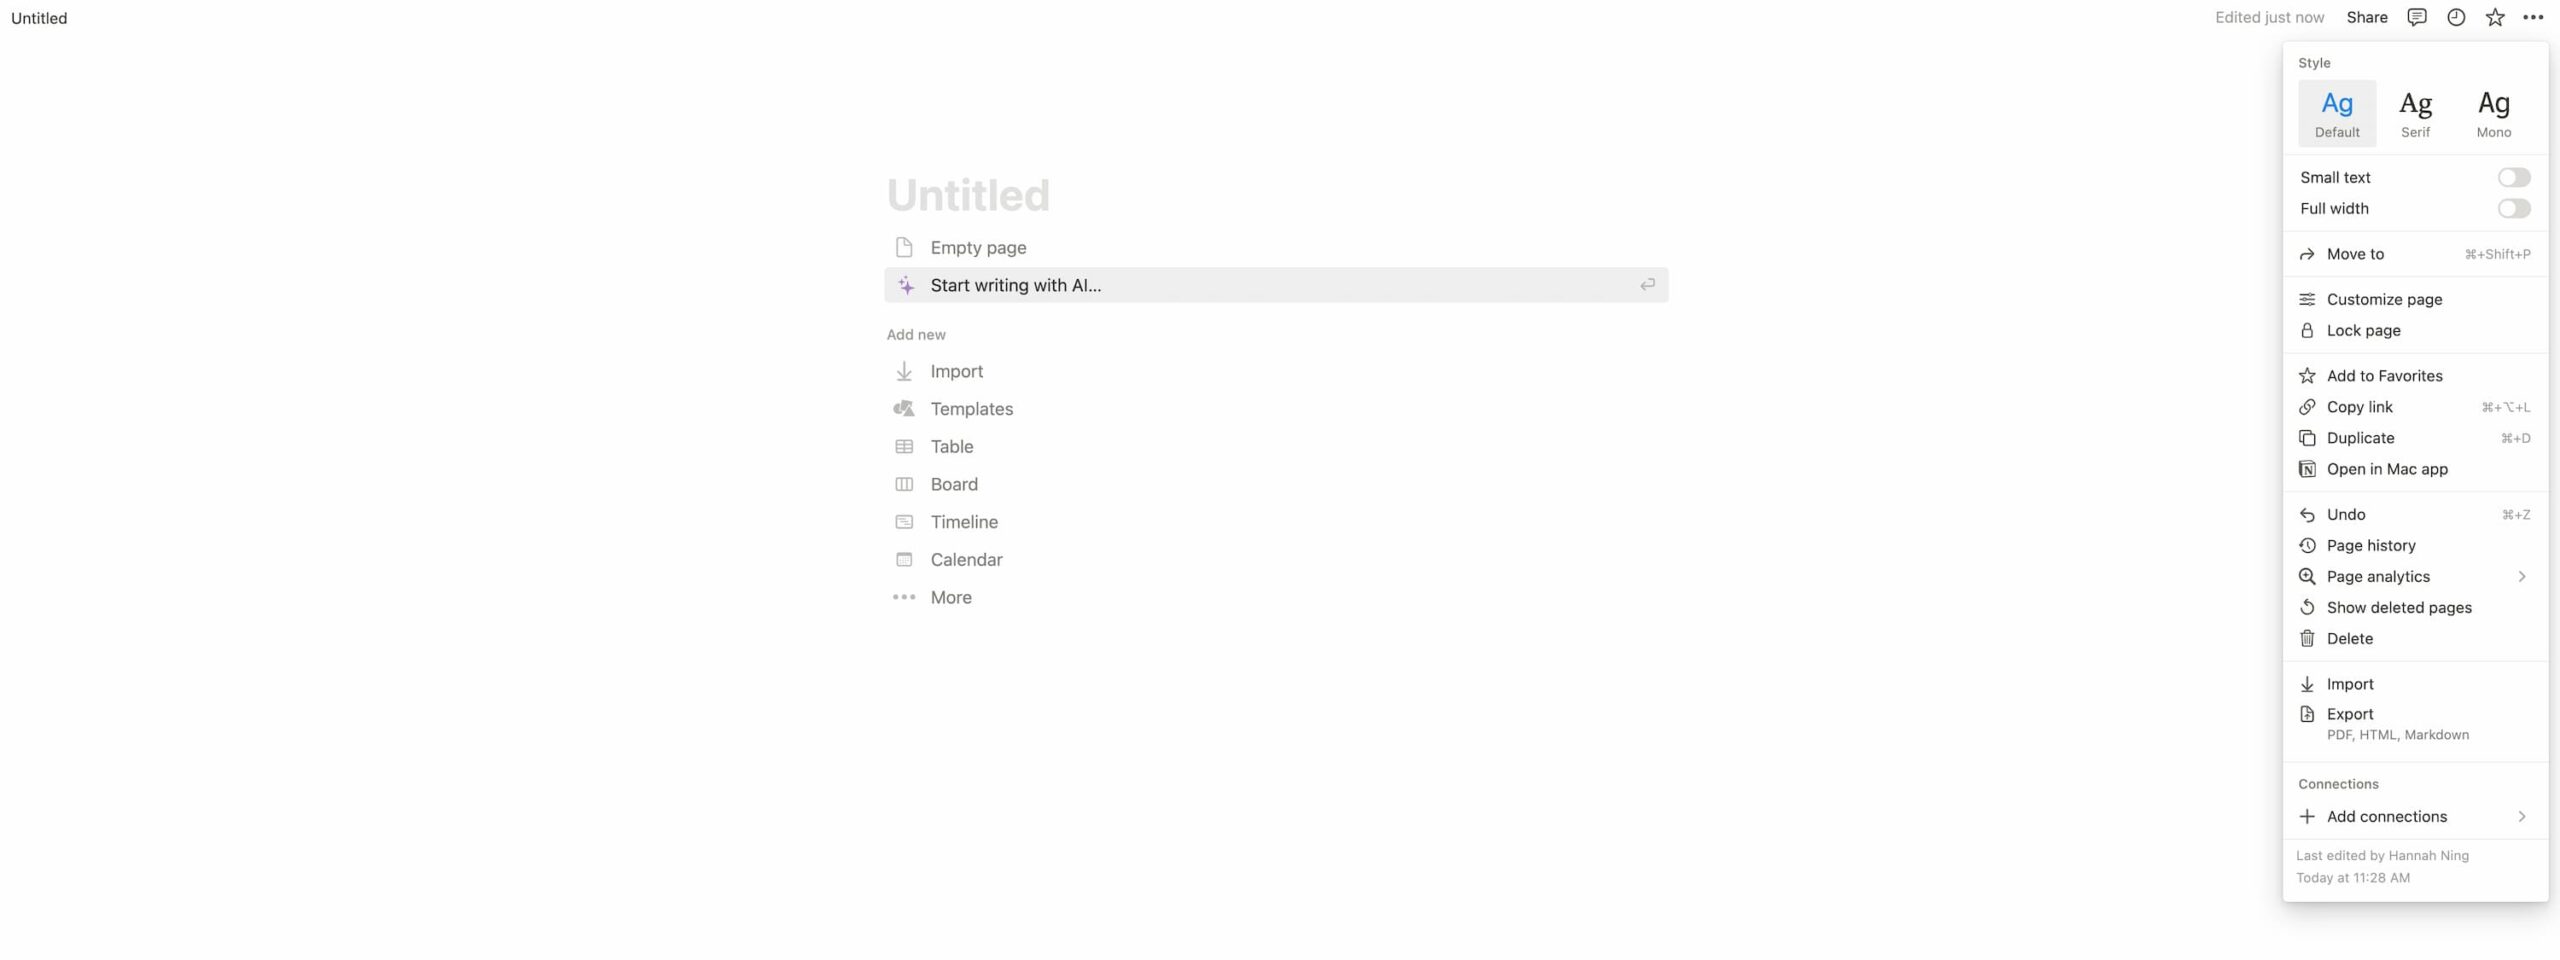
To customize the general appearance of the page, click on the three dots in the upper right-hand corner.
First, select the font you prefer. Currently, Notion provides three fonts (default, serif, and mono). However, you can add your own fonts, which I’ll discuss later in this post.
Next, adjust your page to “Full width”.
Every time you create a new page, make sure to set the same font and adjust the page to full width for visual cohesiveness.
Next, click on the three bars in the upper left-hand corner. Head to the “Settings” tab and upload an icon of your choice.
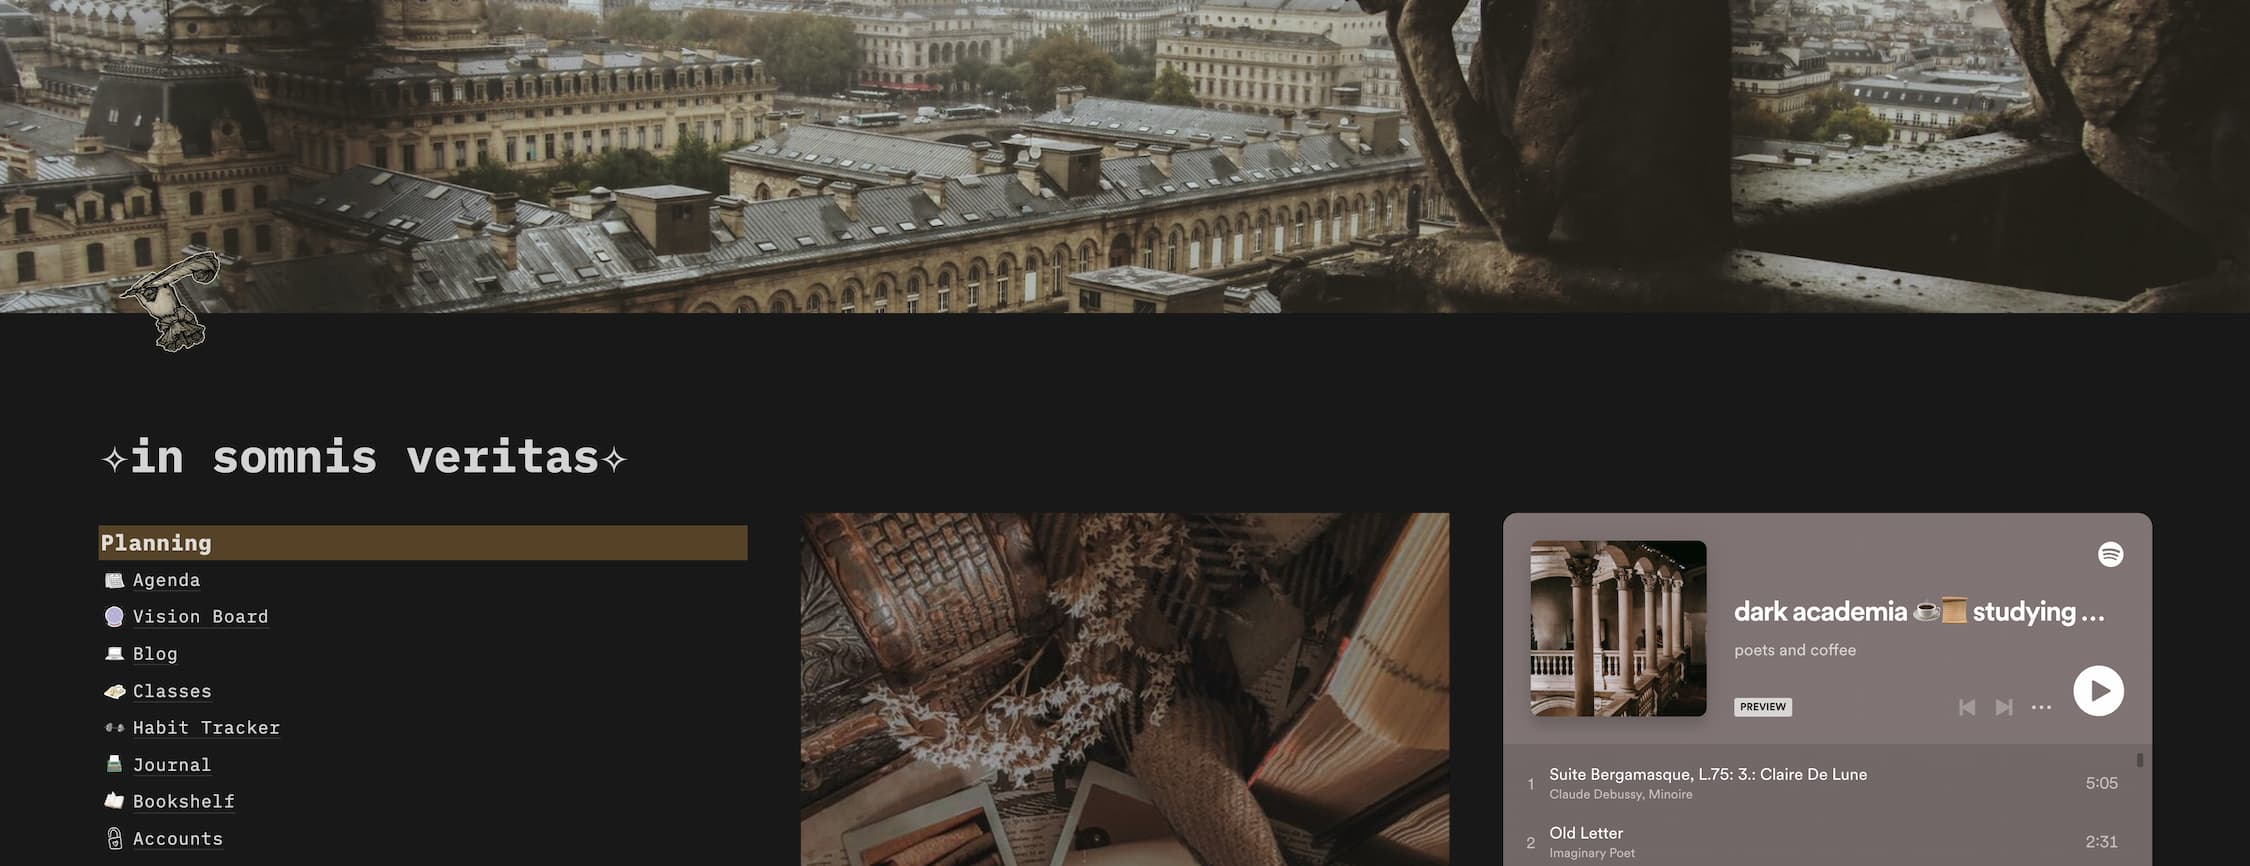
If you would like your Notion setup to appear in dark mode, go to “My notifications & settings” and select “Dark” next to “Appearance”. As you can see, my dark academia setup below is toggled to dark mode.
Choose Page Icons
When you hover over the page title, you’ll notice that you have the option to add an icon. You can use the icons provided by Notion, or you can upload your own.
I get almost all my icons from Giphy. They’re all animated, which adds visual interest to my Notion pages. All you have to do is type a keyword in the search bar and head over to the “Stickers” tab.
Then, right-click on your image of choice, select “Copy image address”, and paste the URL in the “Custom” tab back in Notion.
Here are other sources for Notion icons:
- Notion.vip (simple icons organized by category)
- Icons8 (provides 50+ styles of icons organized by category)
You can even customize your own icons. As I mentioned, Canva is my preferred graphic design website. To create an icon, all you have to do is:
- Head over to Canva and create an account.
- Click on “Create a design” in the upper right-hand corner.
- Select Logo.
- Add elements from Canva’s library or upload your own graphics.
- Animate elements by selecting an element and clicking on the “Animate” option in the top bar. If you choose to animate an element (or elements), make sure to download the design as a Gif file.
- Unfortunately, with the free plan, you cannot resize the design. Since the recommended Notion icon size is 280px by 280px and the Logo design size is 500px by 500px, you will need to resize your design. First, download the design. Then, upload it to iloveimg, enter the desired pixel dimensions (280px by 280px), and download the resized design.
- Now, upload your custom icon to Notion!
Choose Page Covers
When you hover over the page title, you’ll also notice the option to add a cover. Notion provides images from Unsplash, which you can select from.
Try searching terms like:
- Clouds
- Cityscape
- Sunset
- [Color] aesthetic
- Academia
- Mountains
- Royal
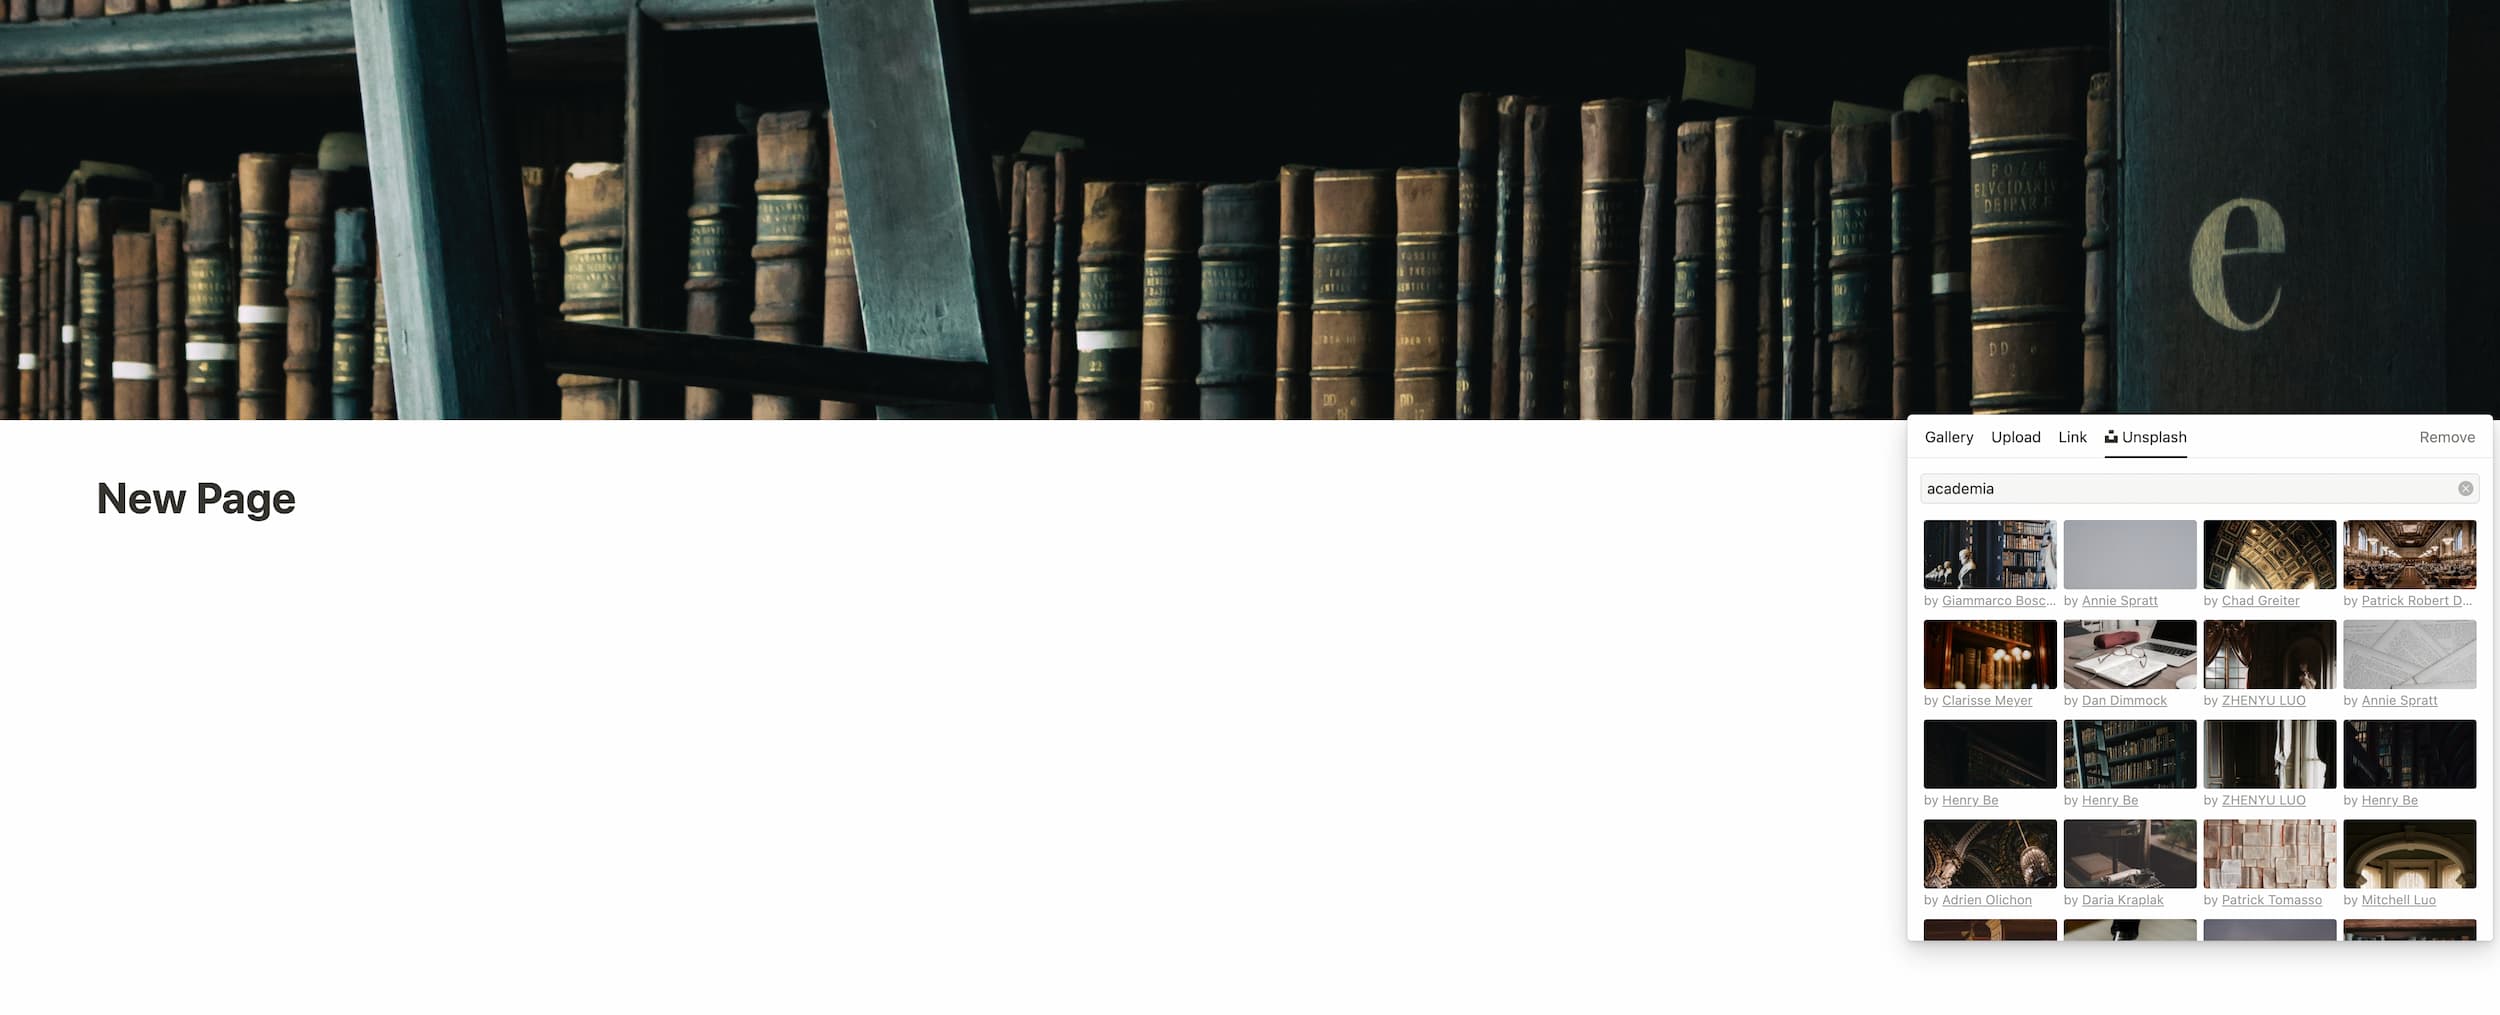
You can also look for covers on Google and Pinterest. Make sure the image you select is at least 1500px by 600px, as these are the dimensions in Notion.
Again, you can create your own cover in Canva. Follow the same steps as before, except instead of selecting the Logo design, select the Facebook cover design. Then, when you resize the image, select a width of 1500px.
Once you’ve chosen and uploaded your page cover, hover over the cover and select the “Reposition” option. This allows you to move the image around to your desired location.
Create Visual Blocks
Once you’ve finished setting up the basic page appearance, it’s time to start customizing your page layout. Since you’re provided with a blank slate in Notion, you have lots of freedom to customize everything to your liking.
Here are tips to create an aesthetic page layout in Notion:
Make Columns
To make columns in Notion, hover over the six dots on the left-hand side of a line. Then, drag the line over to where you want the column to be added.
When making columns, I like to denote each column with a number, since the column is otherwise invisible. Once I add content to the column, I delete the number.
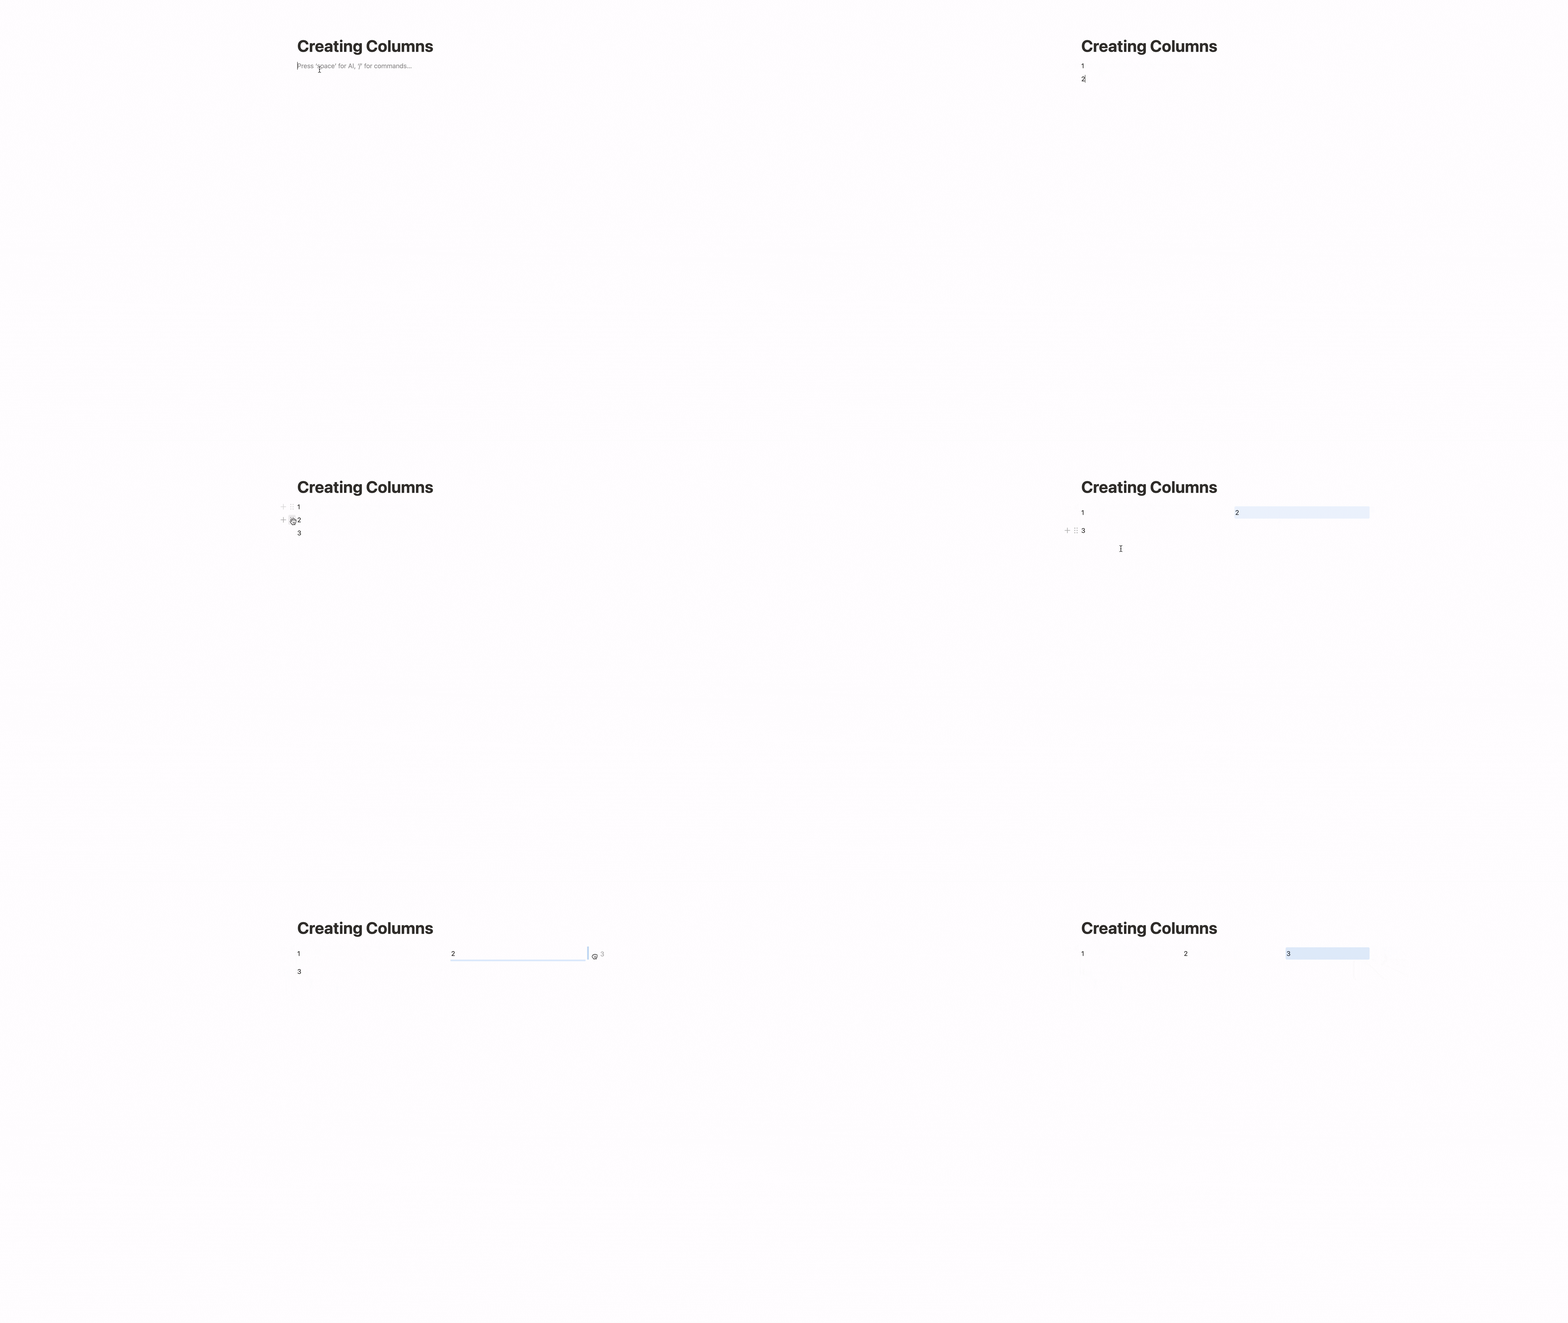
You can add as many or as few columns as you like. Personally, I don’t like to exceed four columns per line.
Once you’ve set up your columns, you can adjust the width by dragging the border. This enables you to create columns of different sizes in the same line!
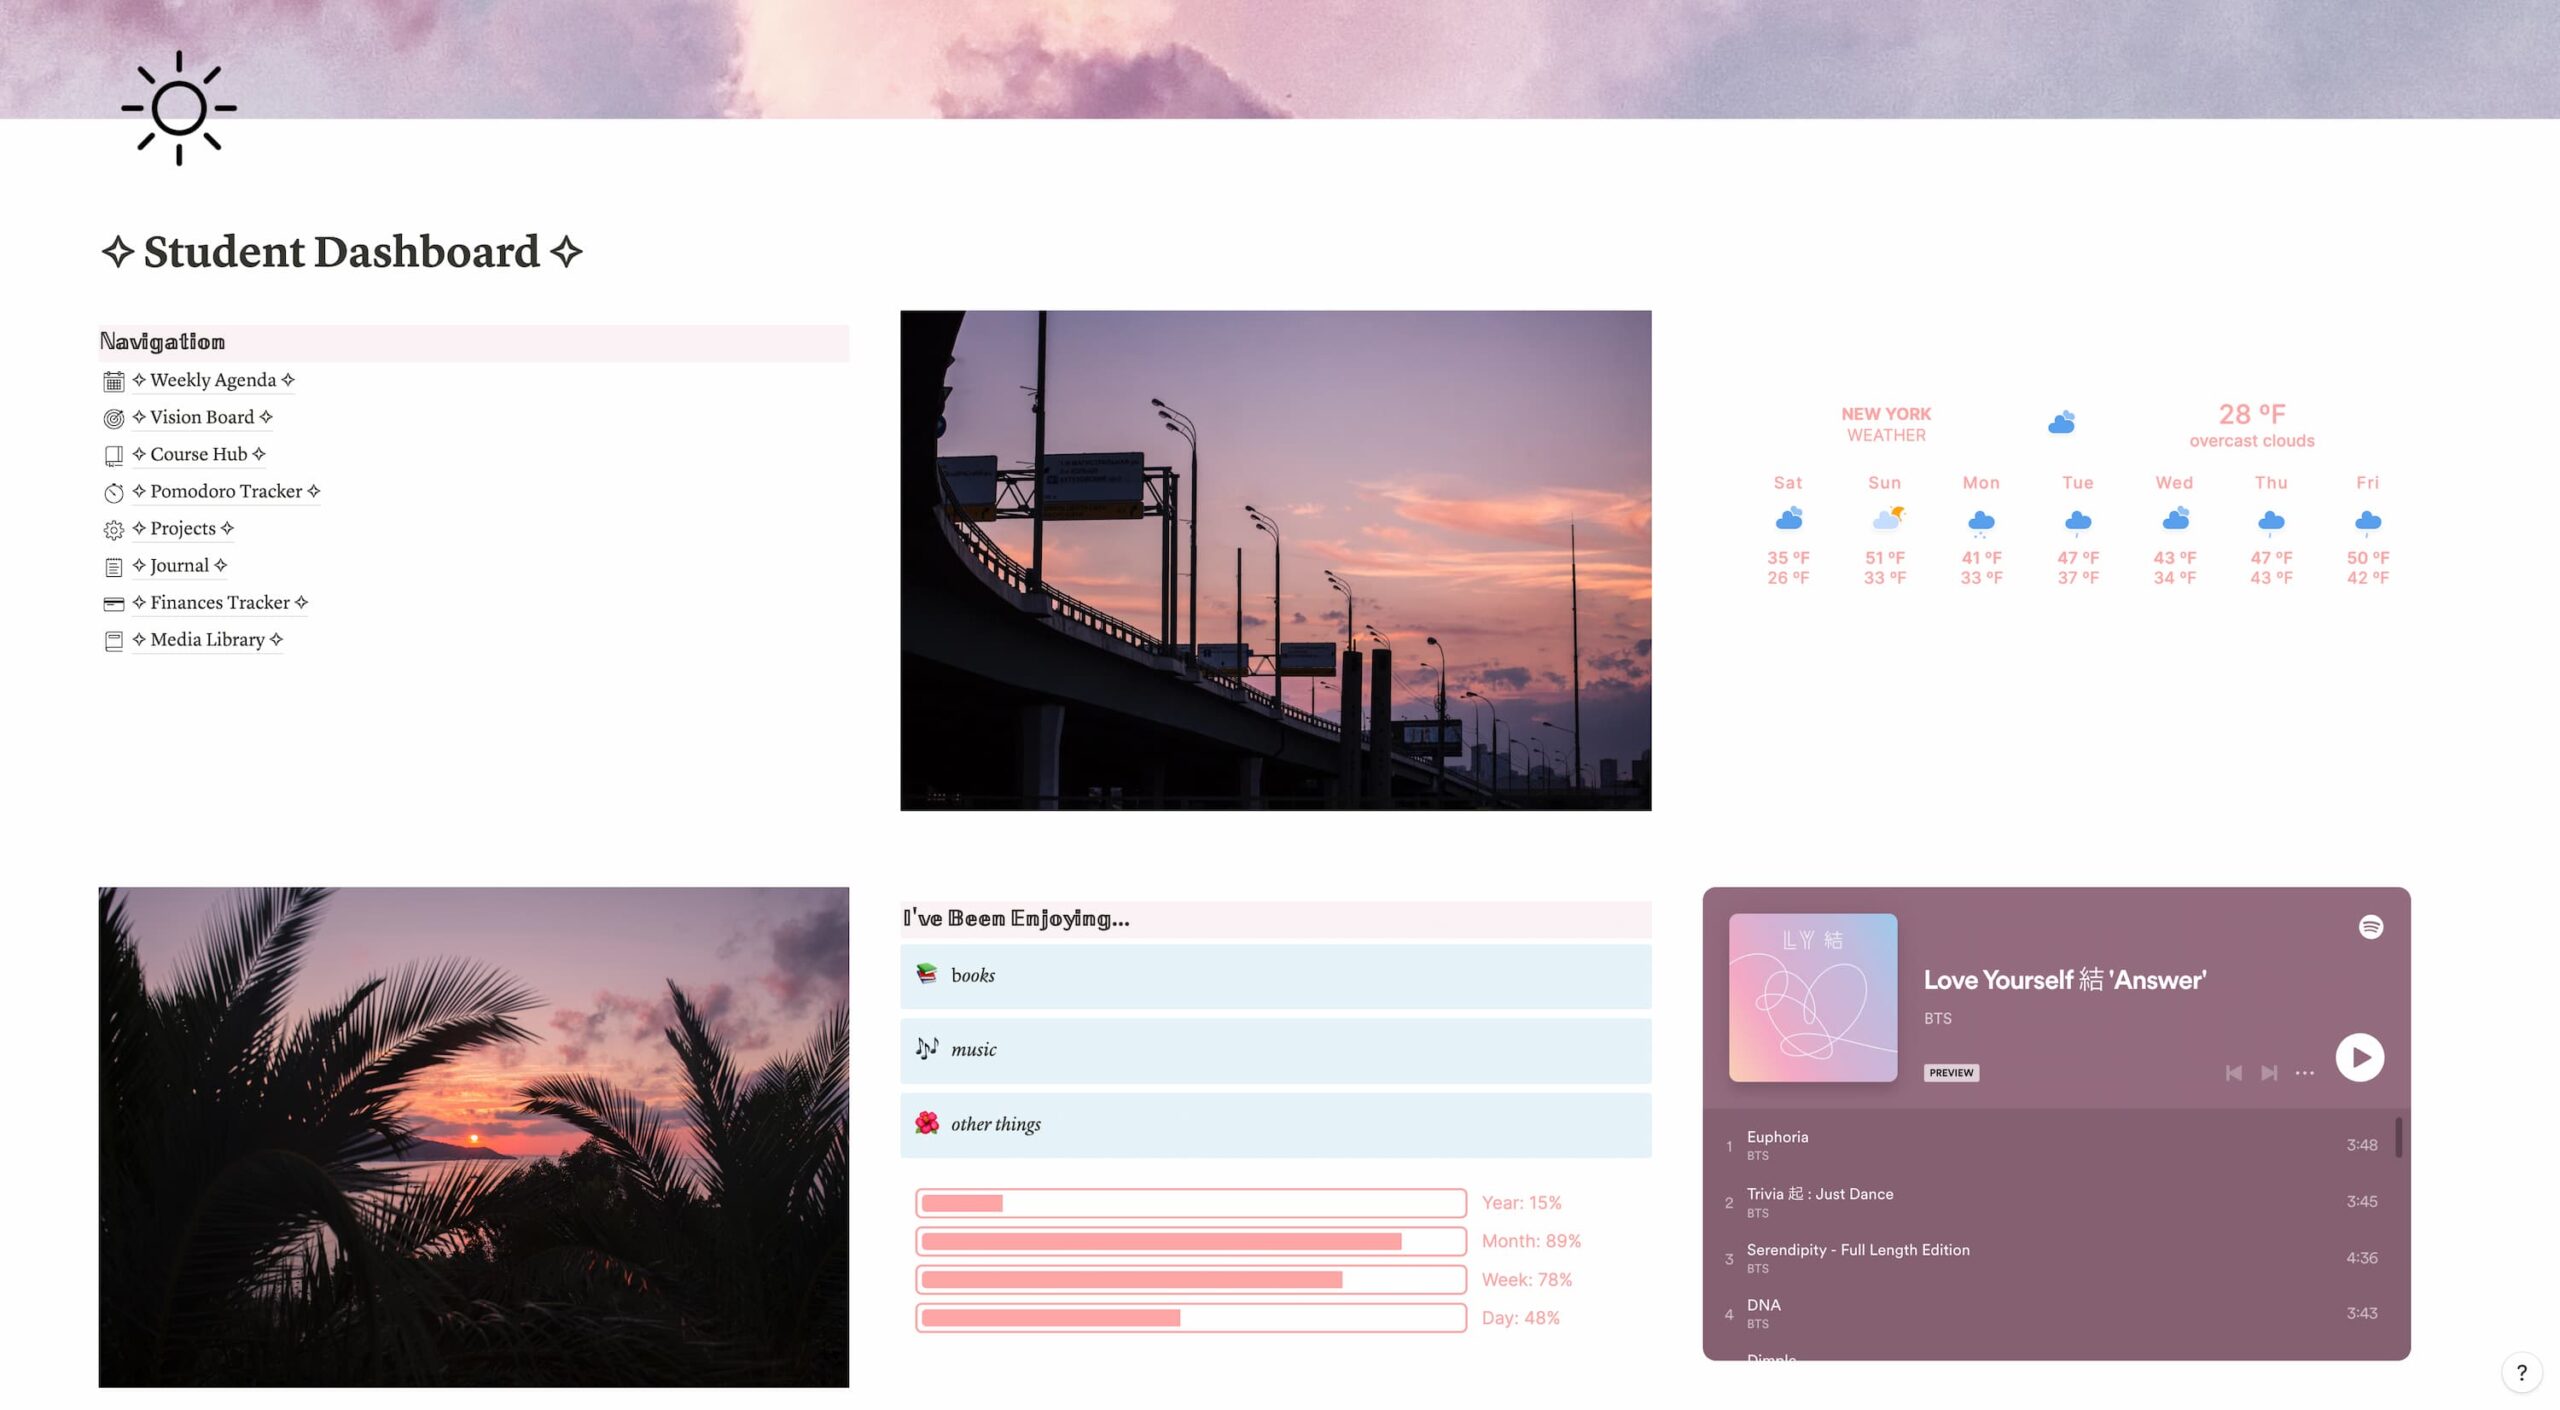
A quick visual tip: To make your Notion setup more aesthetic, put contrasting items next to each other, as depicted in the image below.
Use Divider Blocks
Use divider blocks to separate text or to create visual categorization of content on your page.
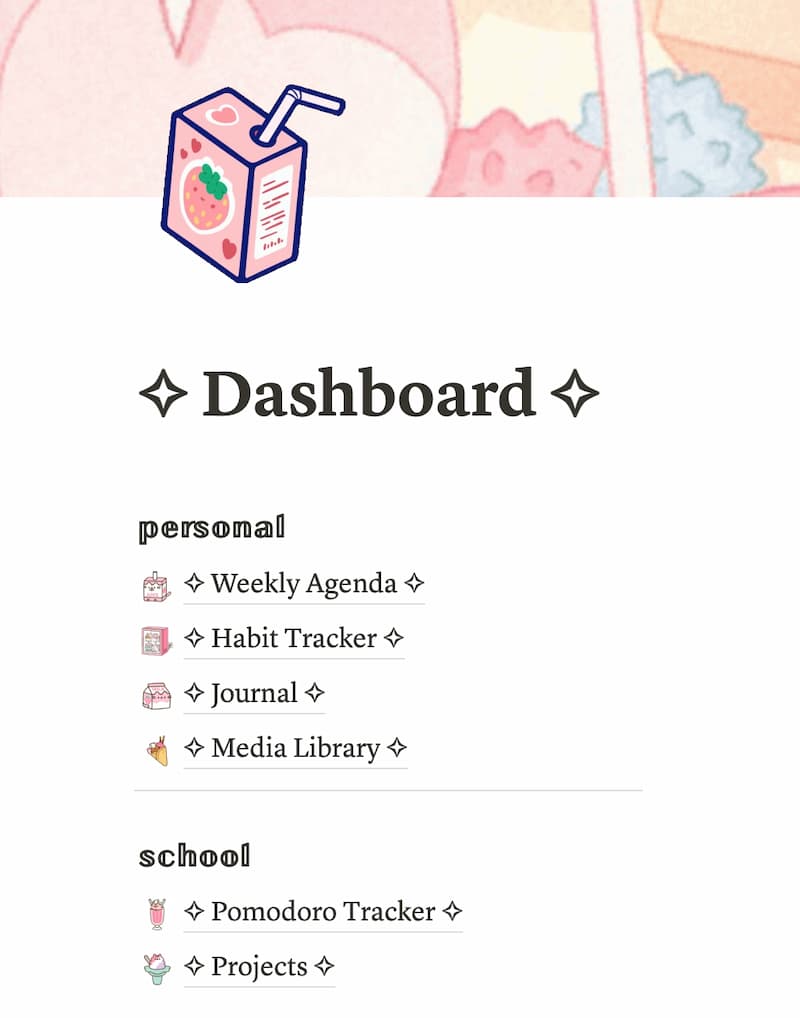
Unfortunately, the only divider available in Notion is a gray line, as pictured in the first image.
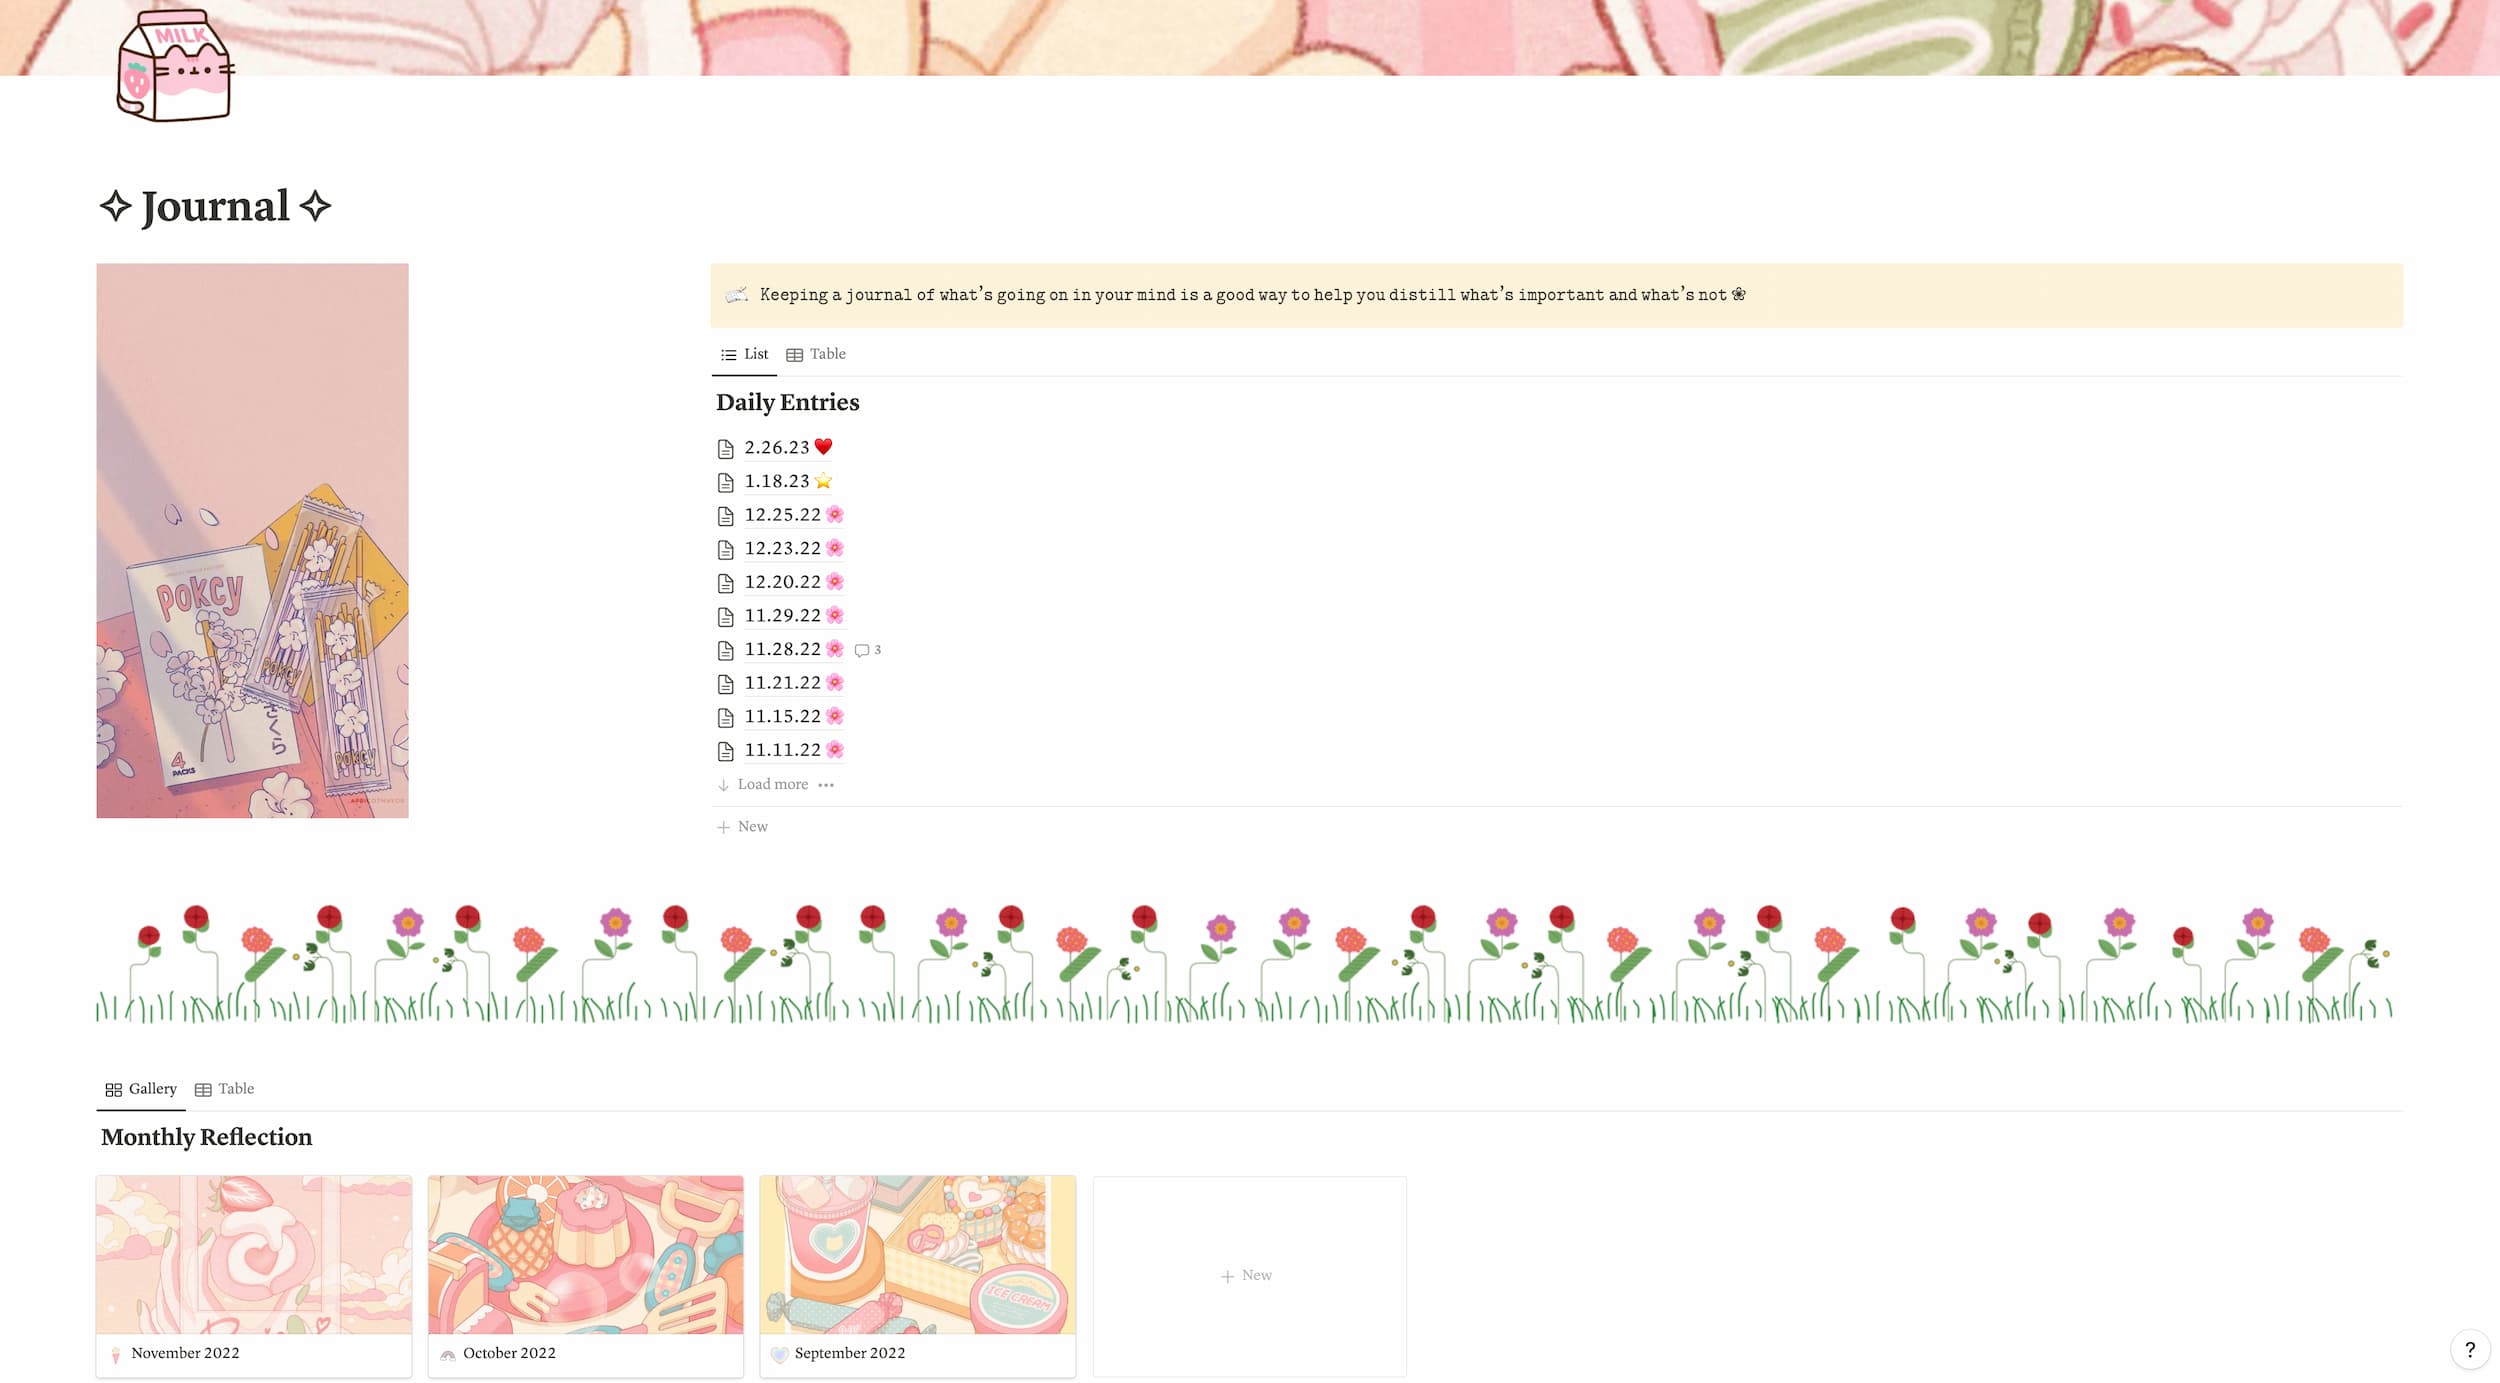
However, you can upload your own image as a divider, or you can get Notion divider packs (the second image depicts one of the dividers from this floral pack).
For more details on the optimal dimensions and for links to Notion divider packs, check out this article from Gridfiti.
Use Callout Blocks
Another way to create visual categorization of content on the page is by using callout blocks. To do so, simply drag content that you want to group together into a callout block.
Then, select the icon, background color, and/or text color you want.
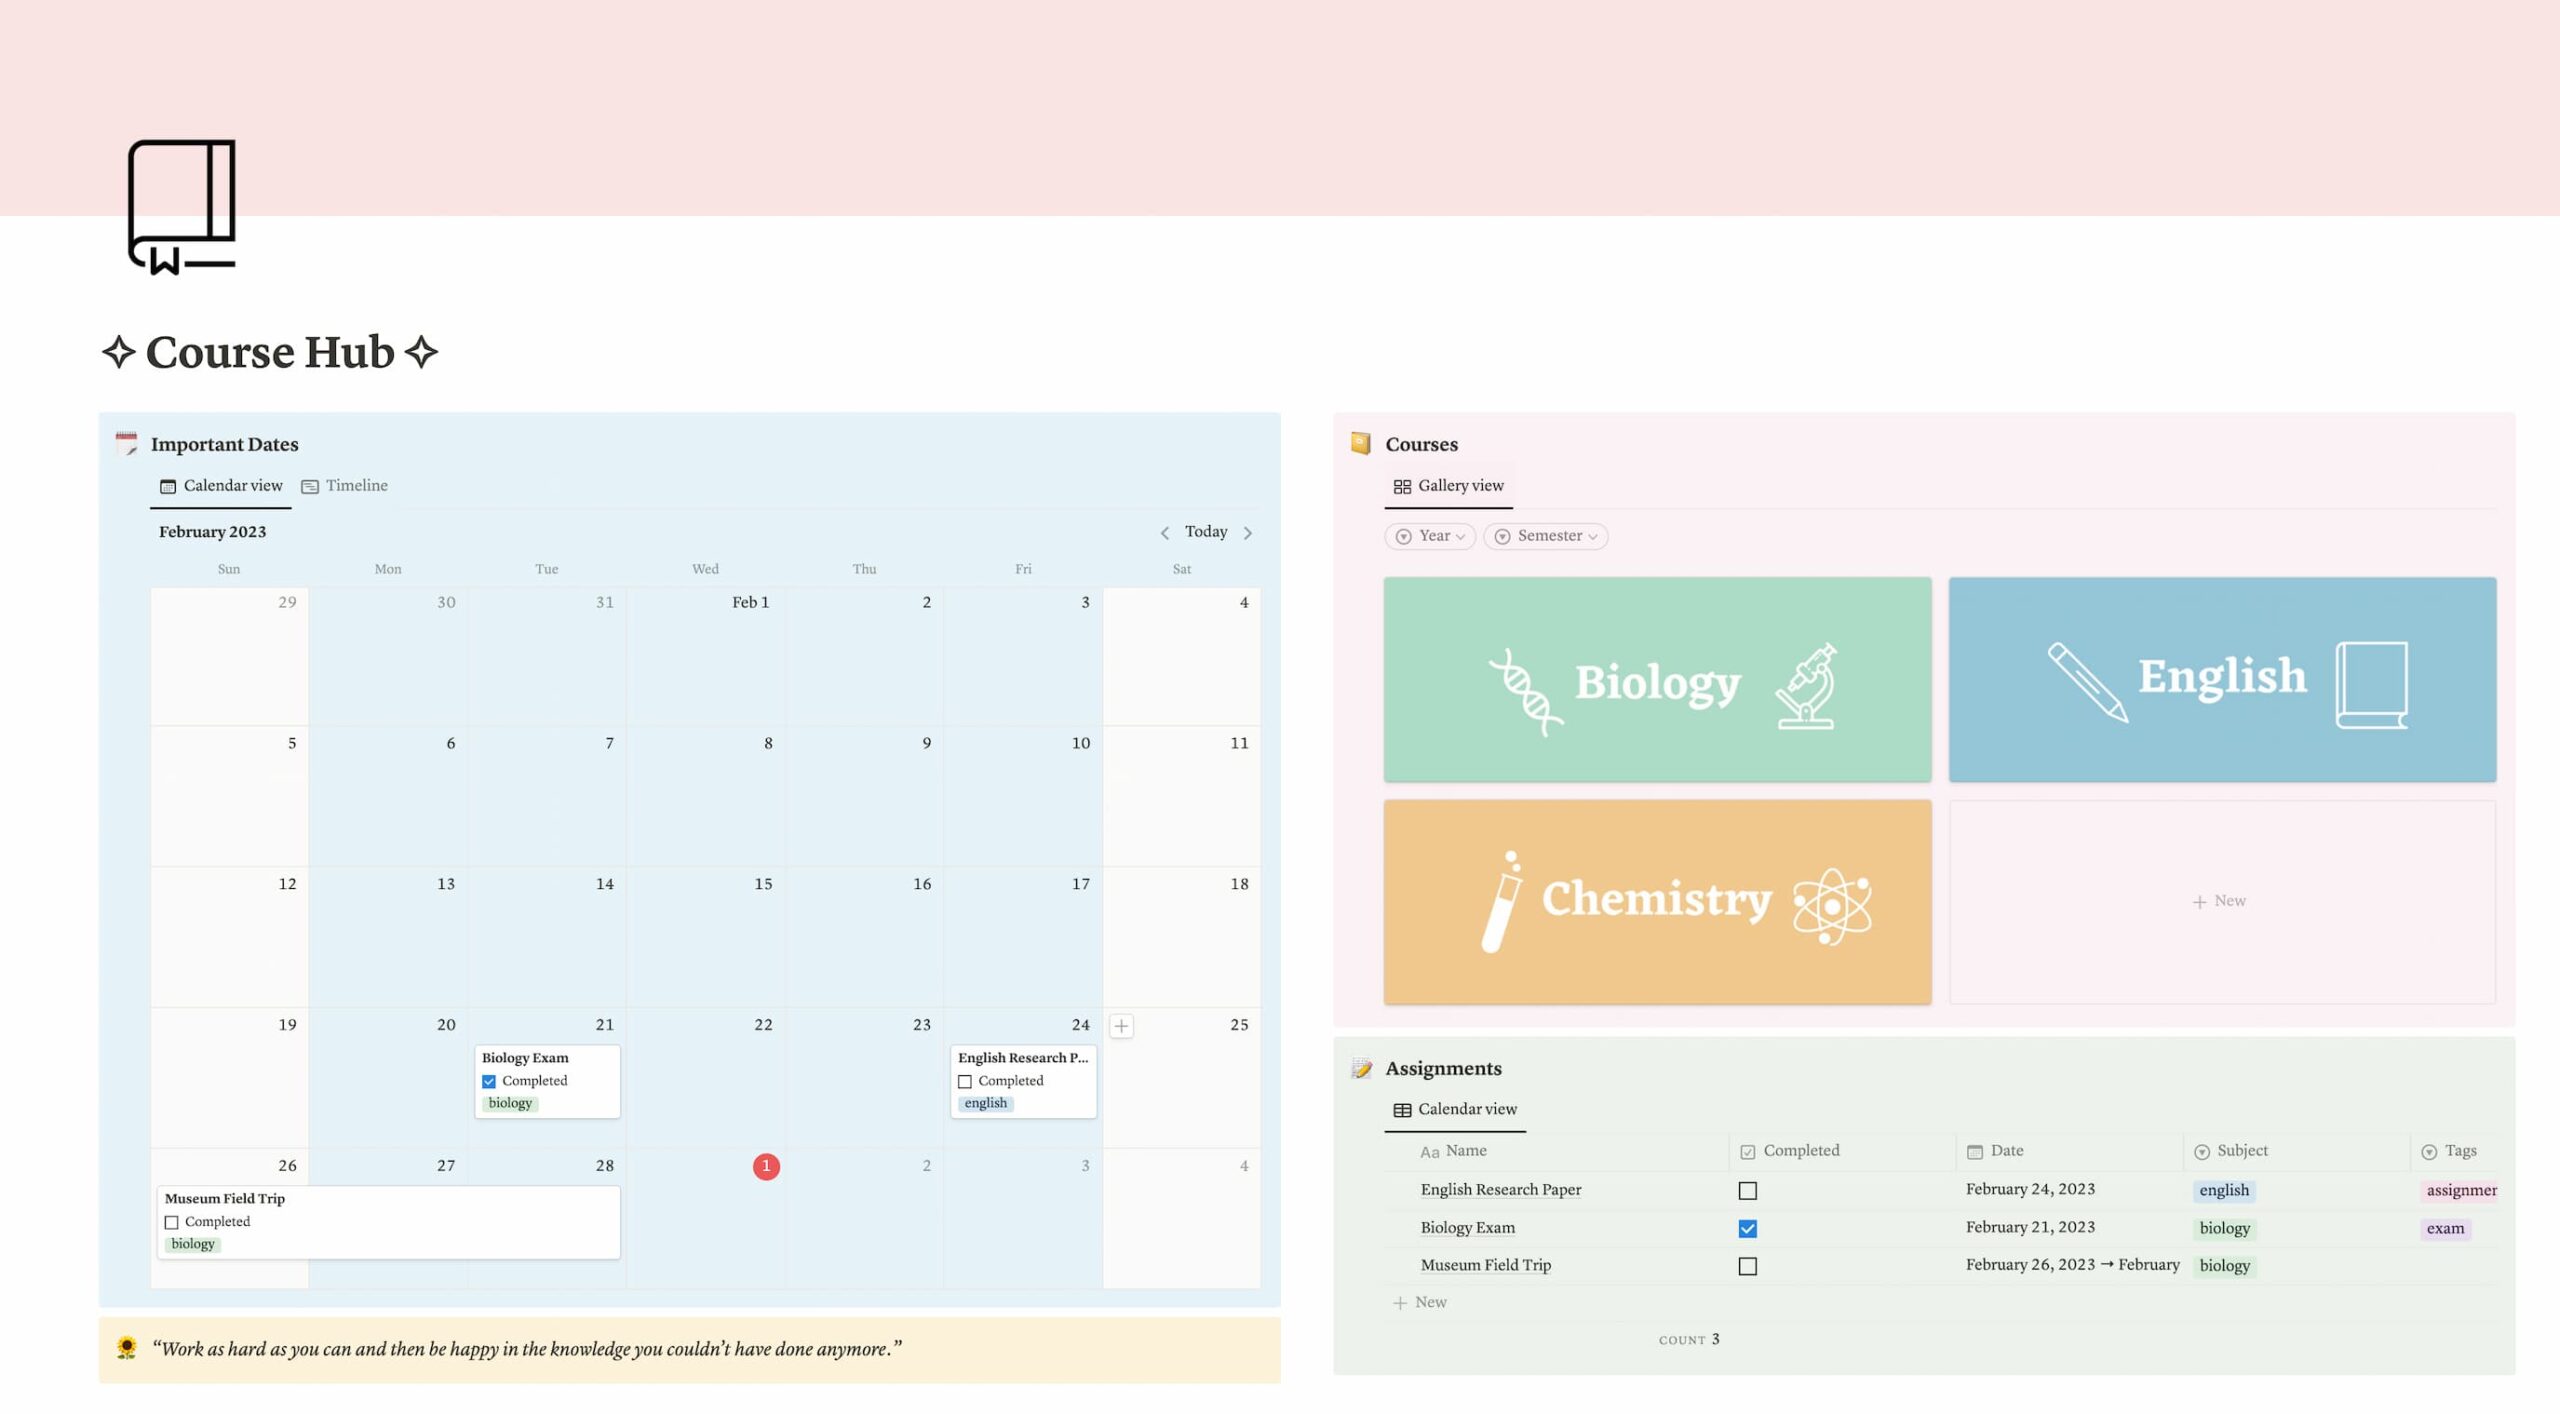
In the image above, each color block is a separate callout block.
Embed Media
One of the most powerful features of Notion is the ease with which you can embed media. Adding media is not only a great way to create an aesthetic Notion setup, but it’s also an easy way to access resources, like your notes, calendar, and helpful websites.
Add Pictures
To add an image to your page, hit backslash and select the “Image” option. You can choose from the Unsplash library or upload your own image.
As I mentioned before, you can find plenty of aesthetic pictures via a quick Google or Pinterest search.
Add Widgets
I get all of my widgets from Indify.
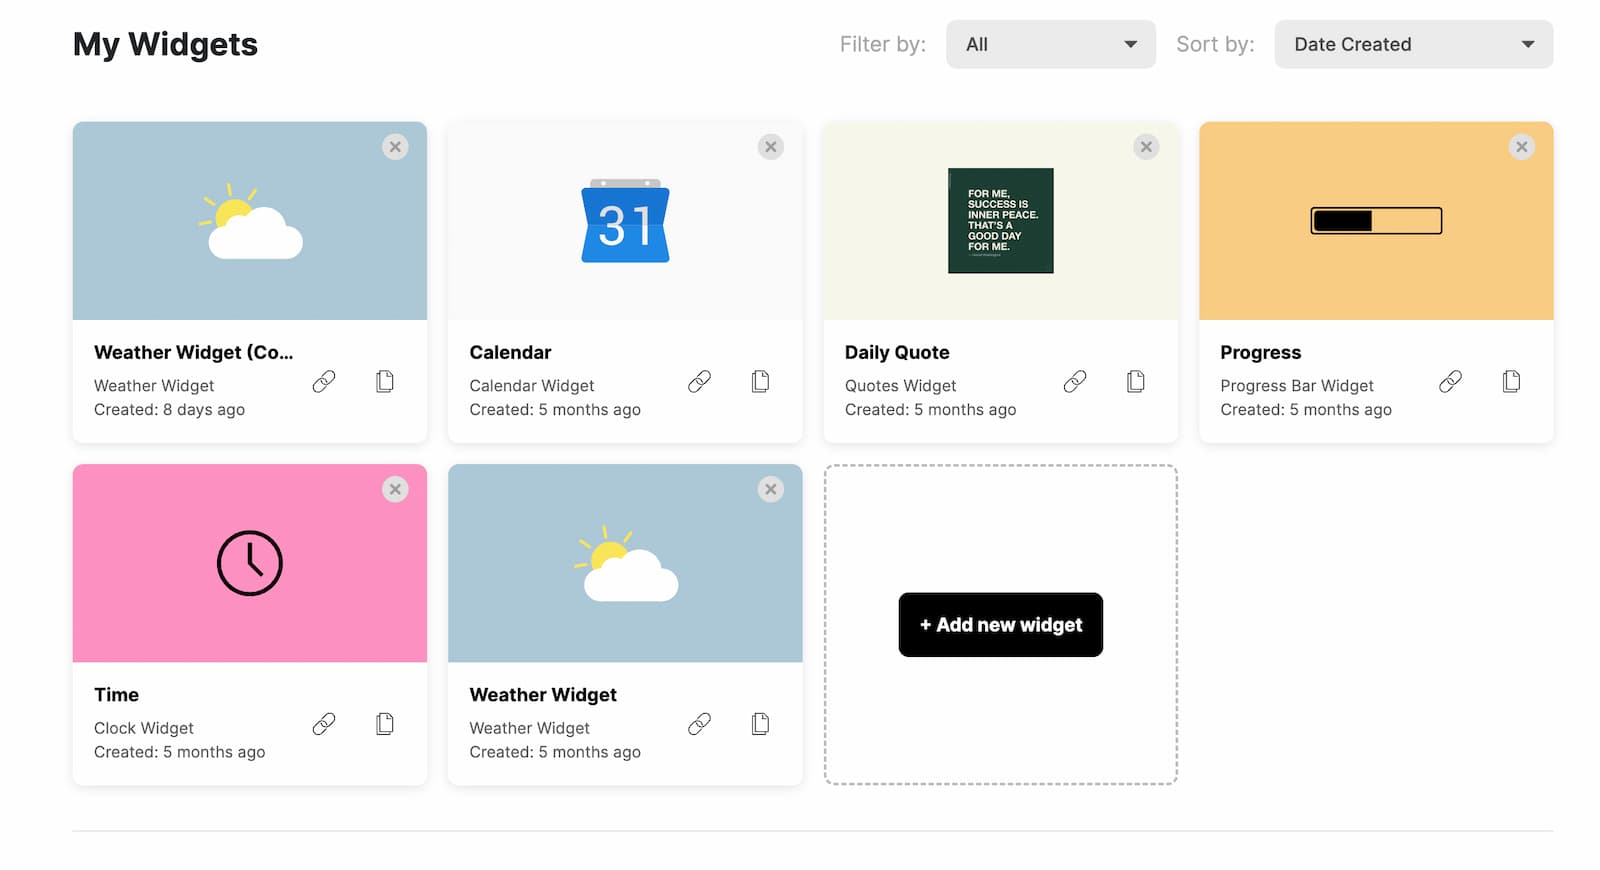
As you can see, I’ve used the Weather widget and the Progress Bar widget from Indify in the setup below.

In my weekly agenda setup, I’ve inserted a Calendar widget, which is integrated with my Google Calendar!
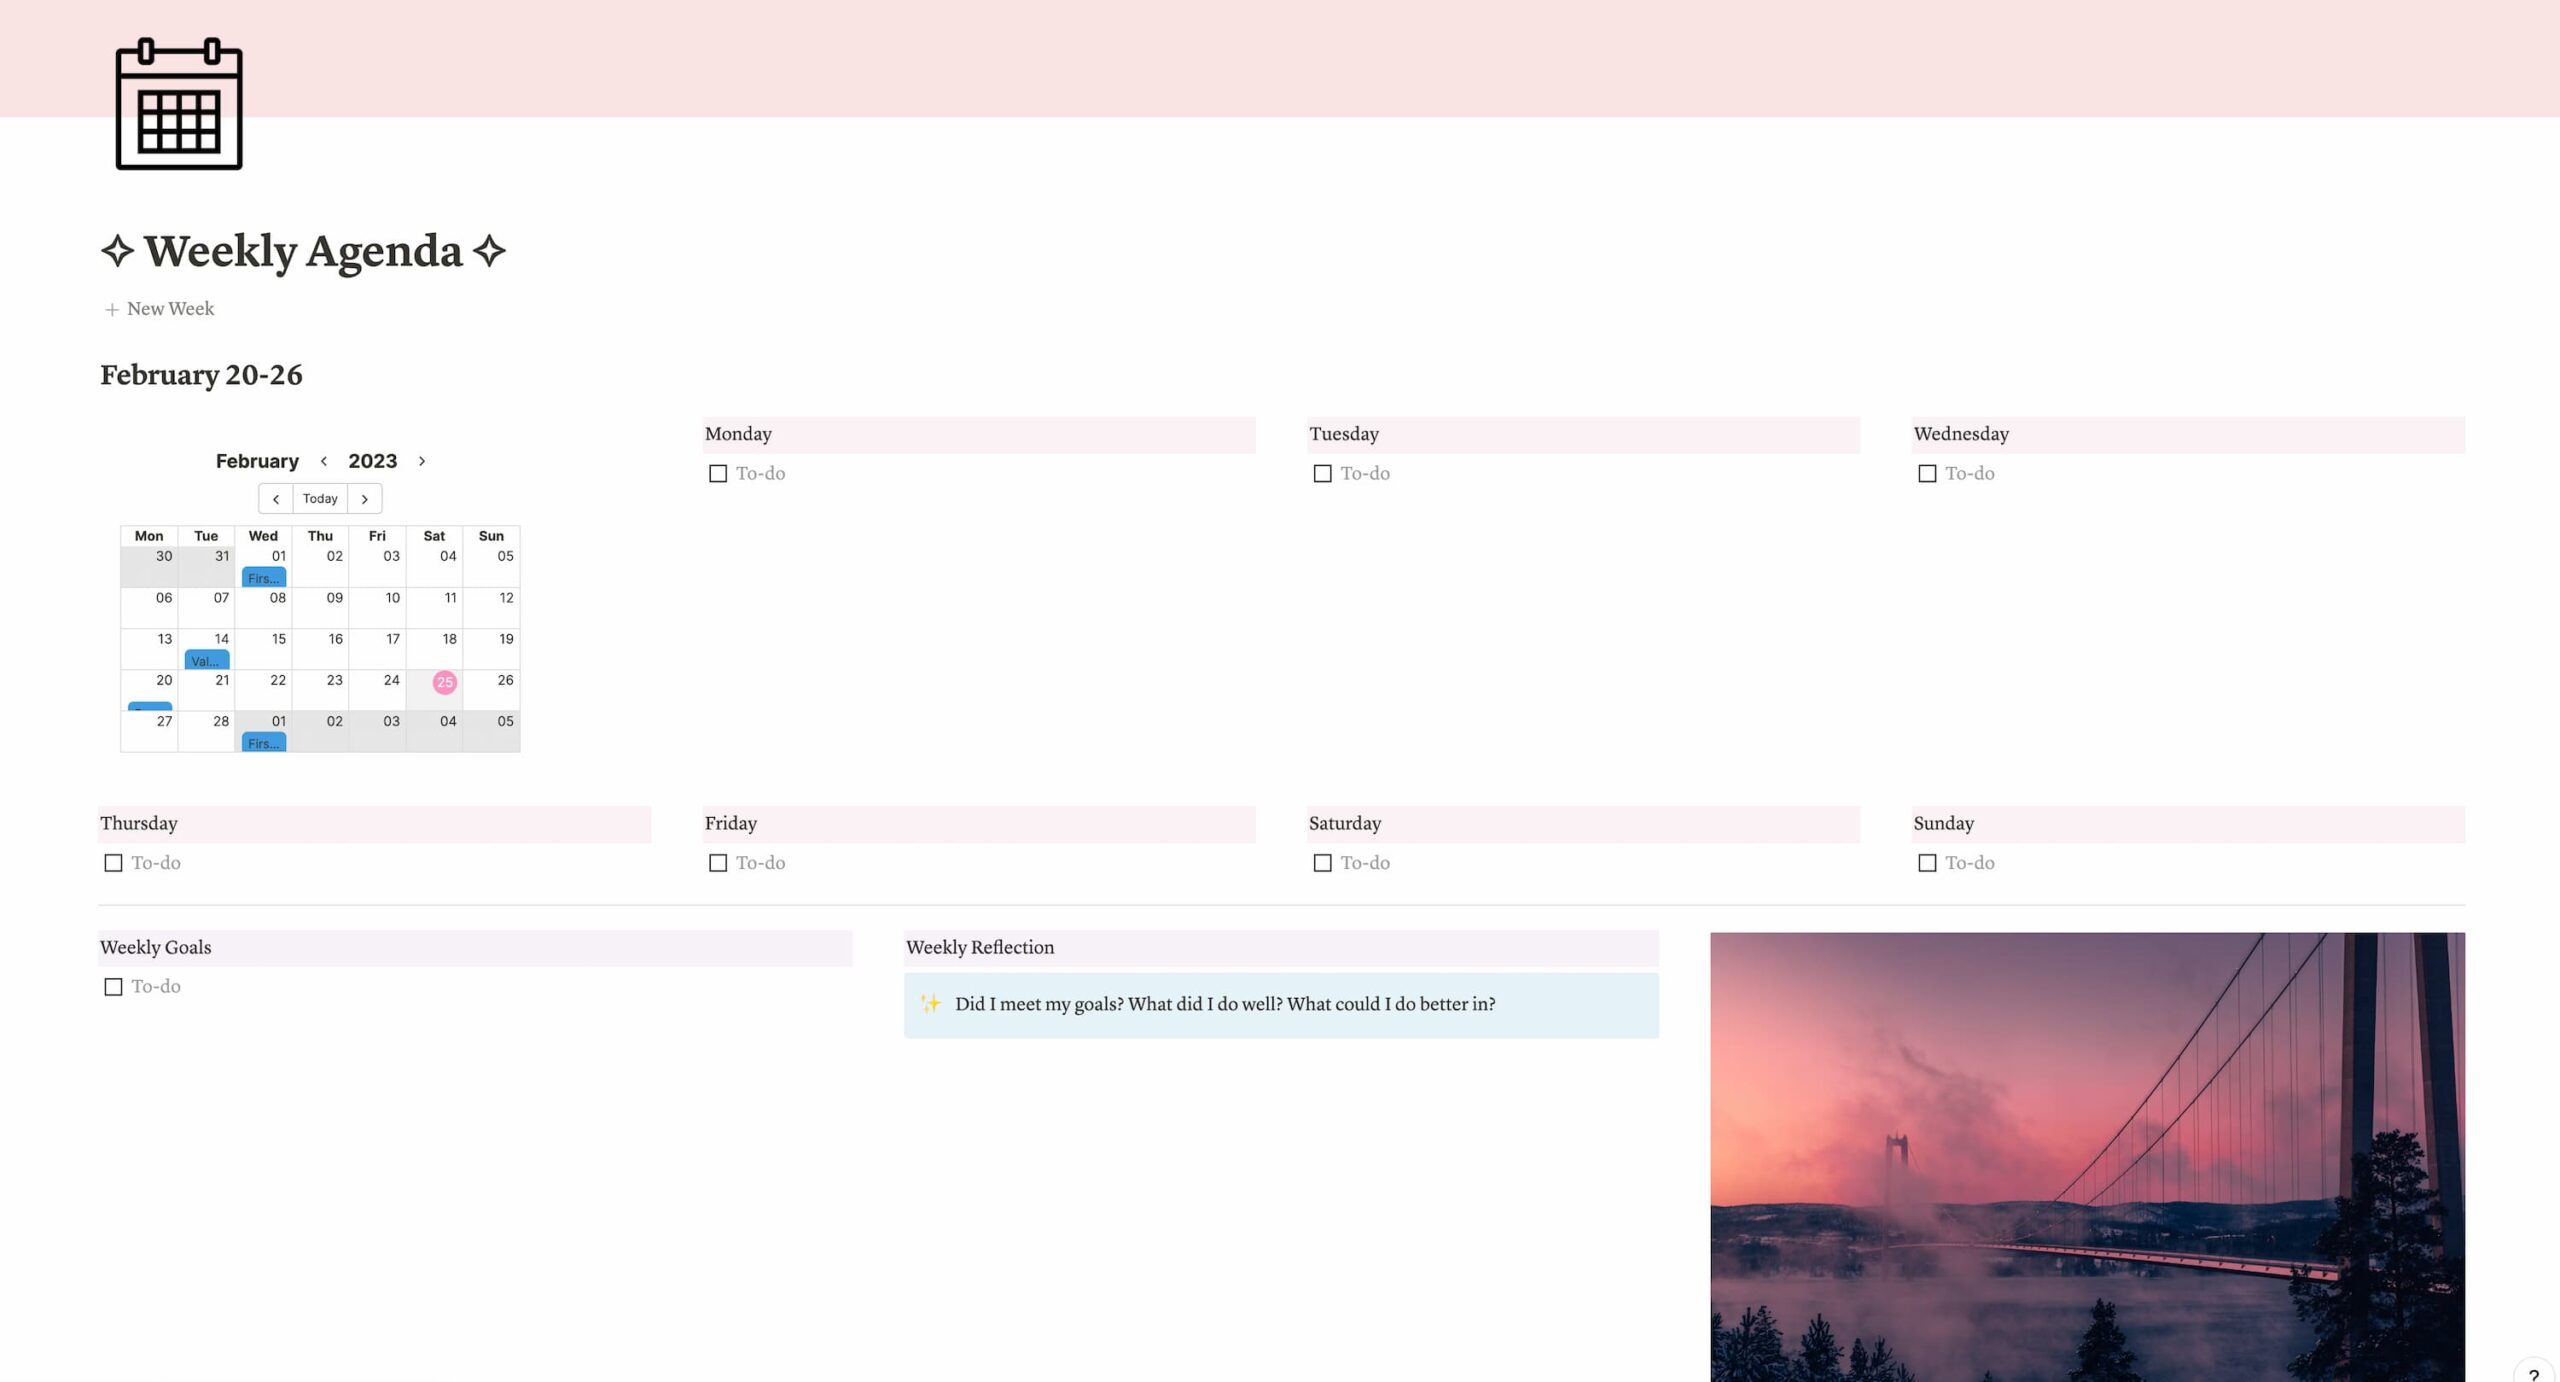
You can also find plenty of widgets on Apption, which provides quick tutorials on how to set up and embed each widget.
Add Web Bookmarks
To add a web bookmark, hit backslash and select “Web Bookmark”. Paste the link to the website you would like to add.
This creates a visual bookmark on the page.

Add Other Media
In addition to pictures and widgets, you can embed all kinds of media, like pictures, widgets, PDFs, YouTube videos, Spotify playlists, Google Drive Files, and more. These will all display visually on the page.
As you can see in the layout below, I’ve even embedded the pomofocus.io webpage to create a Pomodoro Tracker page.
Customize Text
Break Up Long Text
Writing lengthy segments of text will give your Notion layouts a cluttered appearance. Instead, break up your text into smaller paragraphs.
Also, make sure to use H1, H2, and H3 headers to organize your text.
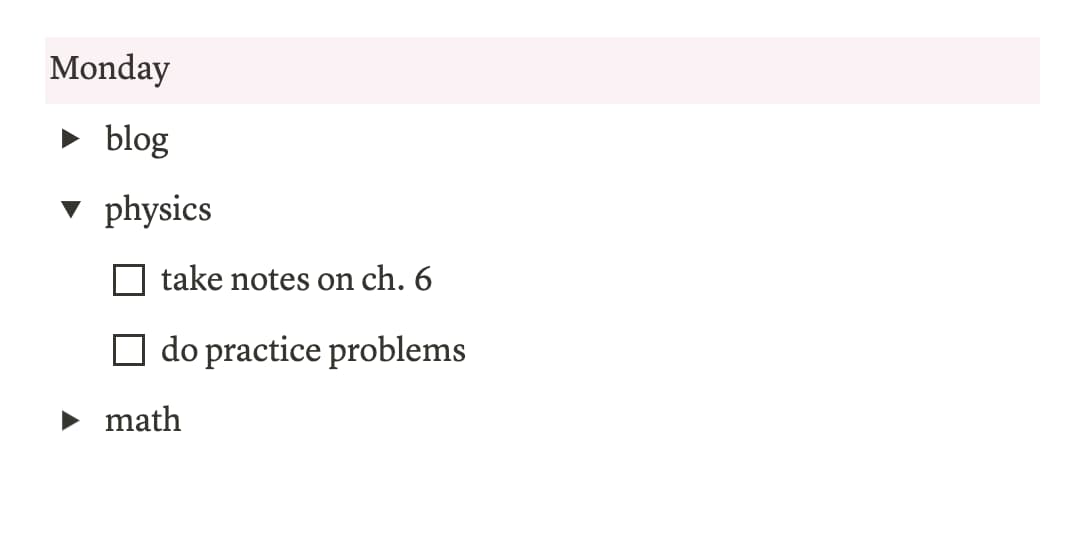
Finally, you can use toggles to group text together. This is what I do in my daily to-do lists.
Use Custom Fonts
If you want to use fonts other than the three provided by Notion, you can.
The first method is to hit backslash and select the “Inline equation” block. Then, add whatever text you want to this block. The downside of this method is that you will need to create a new block for every word.

You can also generate other fonts using FancyTextGuru. This website is fairly intuitive to use. Just type in your text at the top, and you’ll get a selection of different fonts organized into categories.
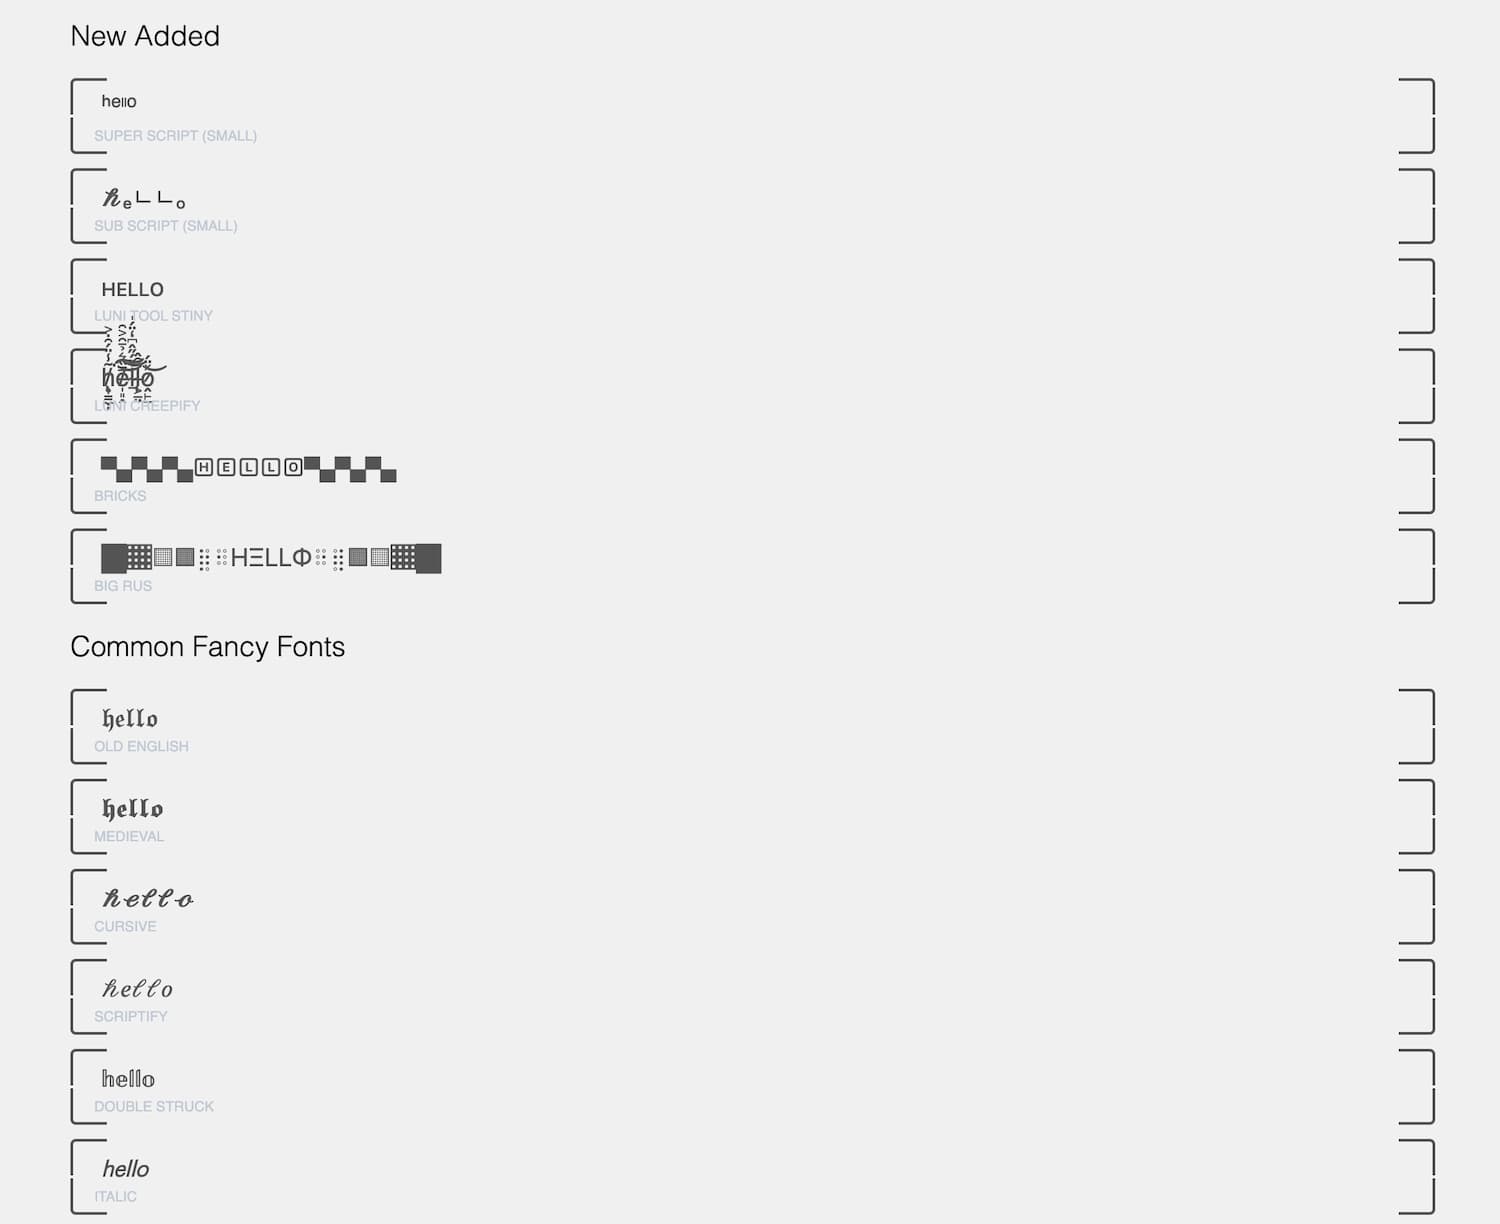
Once you’ve chosen the font you like, you just have to copy and paste it into your Notion setup.
Customize the Background and Text Color
You can change the background and/or text color of a block by clicking on the six dots to the left-hand side. If you would like to change the background and/or text color of several blocks, you can select all of them at once and apply the color change.
If the blocks aren’t next to each other, there is a keyboard shortcut for changing them to be the same color. Once you’ve set one block to the desired color, select the next block and hit ctrl+shift+H.
Use the Quote Block
The quote block can be used to bring attention to a line or few lines of text. You can see how it appears at the top in the image below.
Use the Callout Block
The callout block can similarly be used to bring attention to a line or few lines of text. You can change the background color, text color, and icon of a callout block.
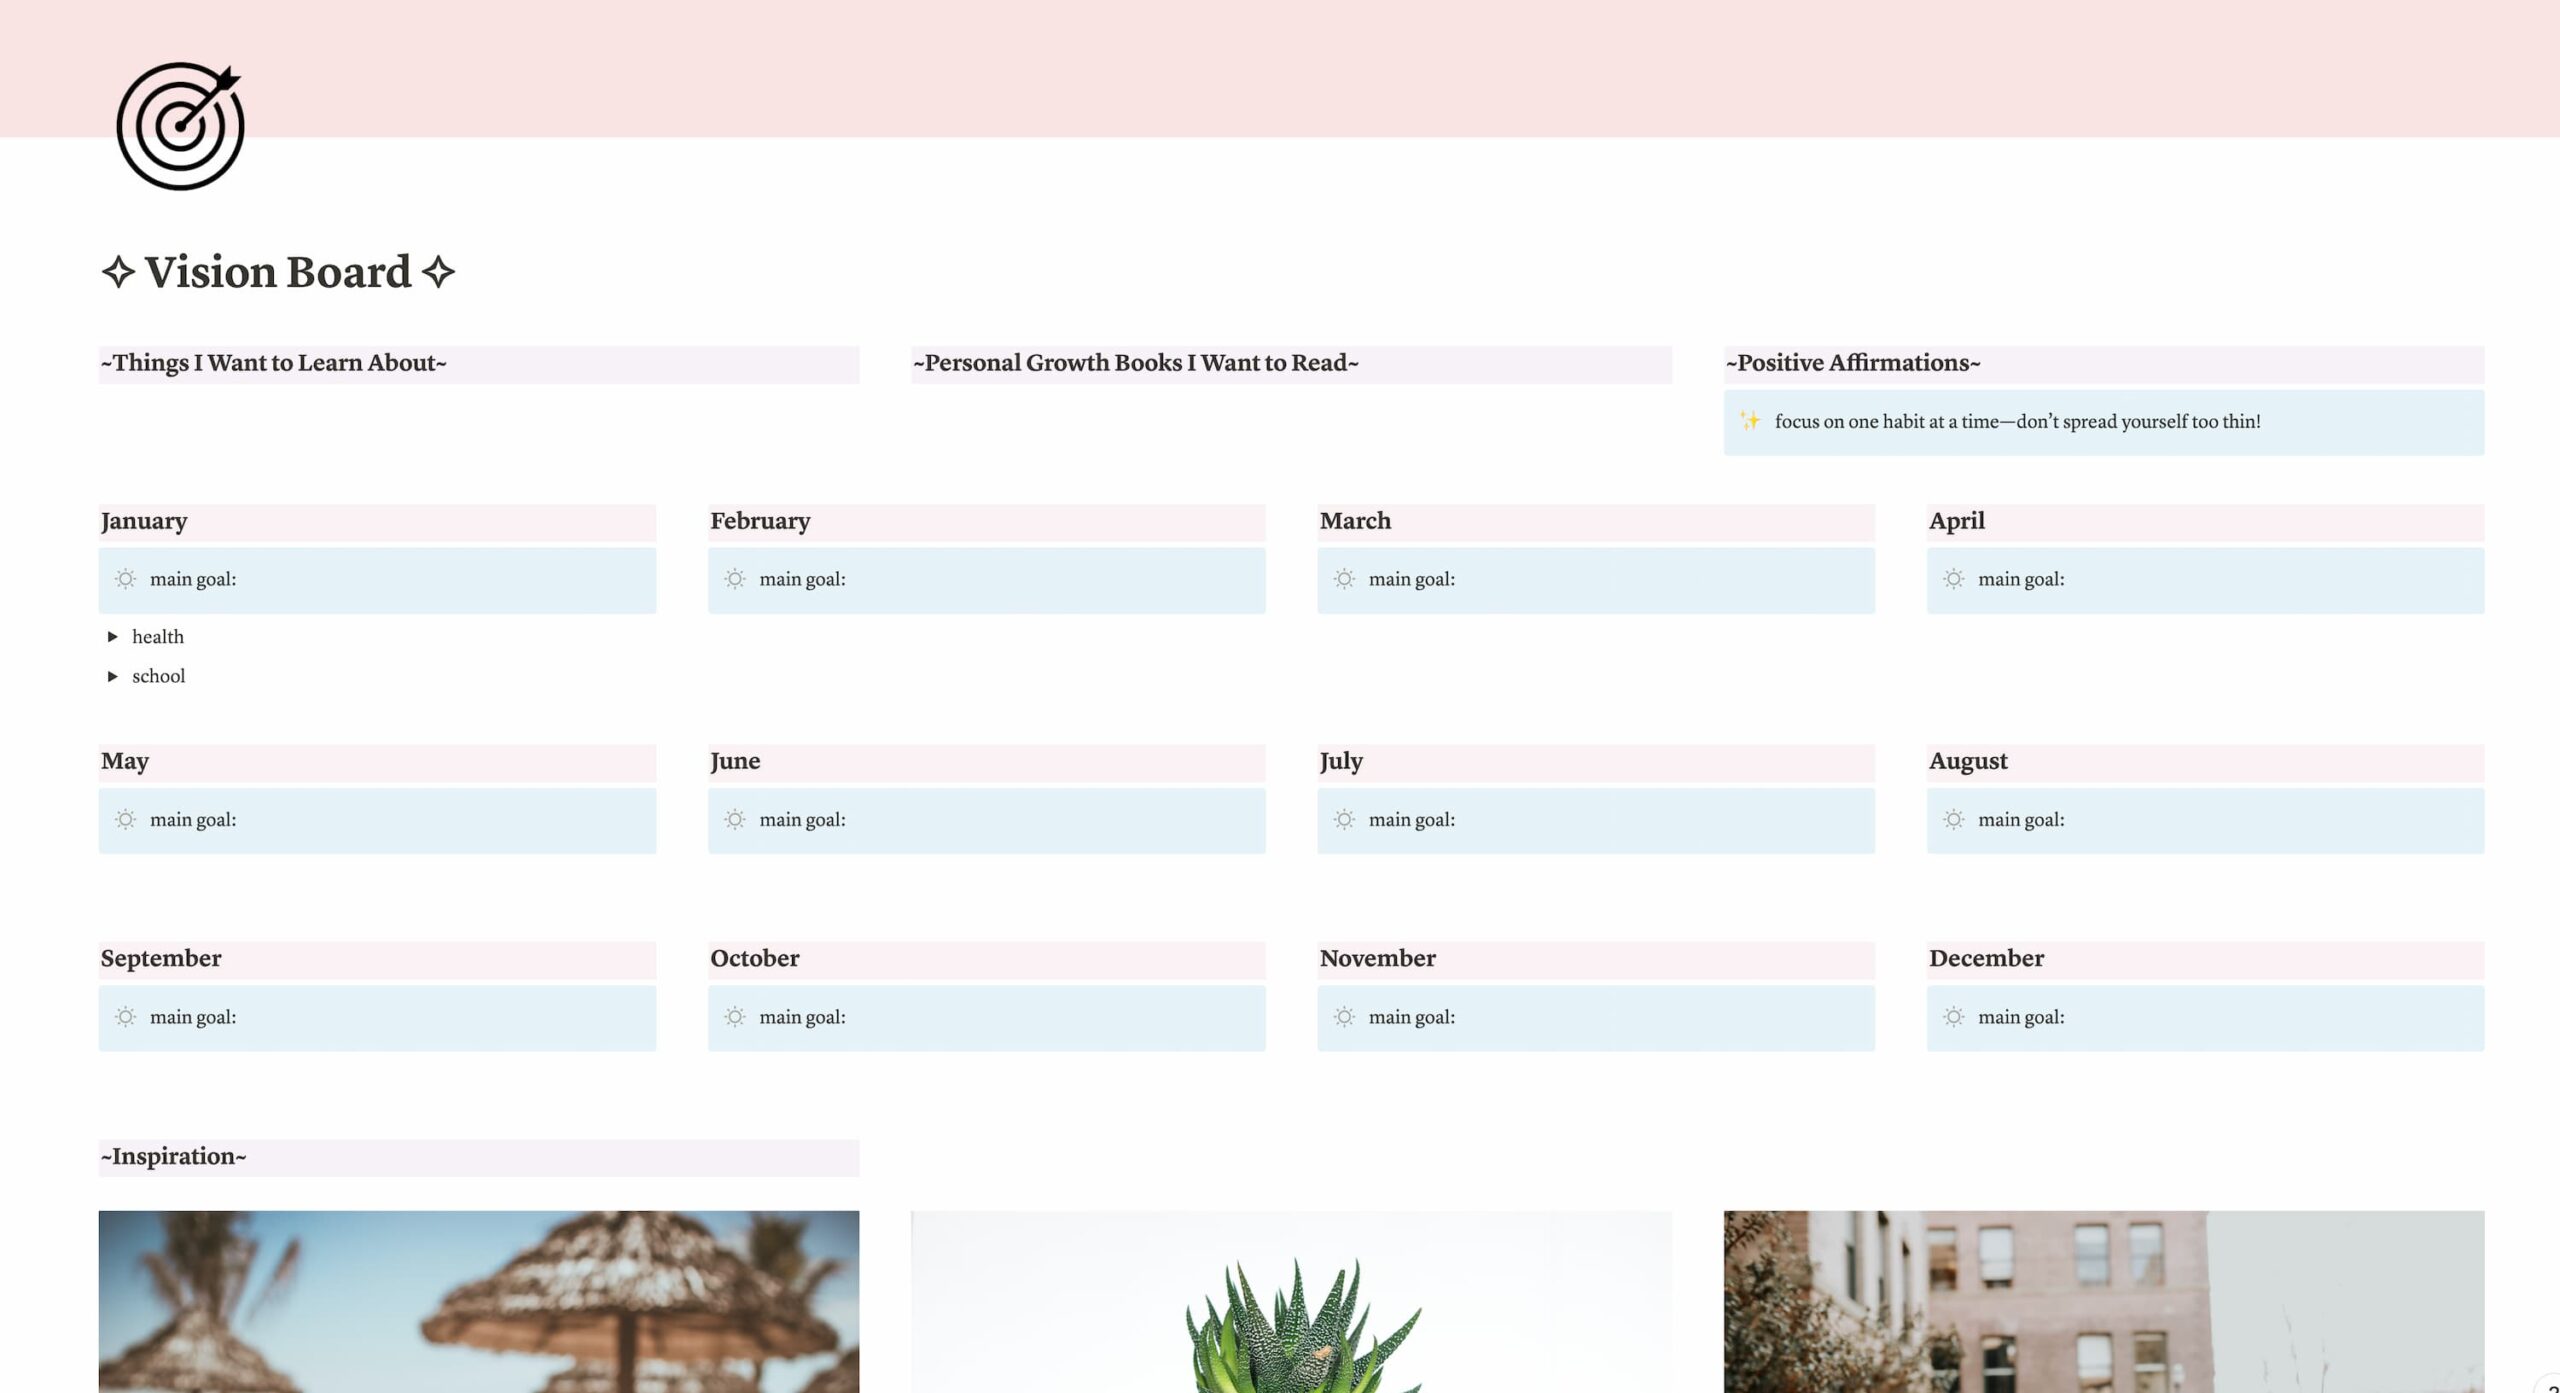
In the Vision Board below, I used a callout block under each month to set apart the main goal.
Use the Gallery View
Of all the database views in Notion, the Gallery view is arguably the most aesthetically pleasing. To add a Gallery view, simply hit backslash and select “Gallery view”. Then, select the database you would like to pull data from or create a new database.
After you’ve created your Gallery view, click on the three dots in the upper right-hand corner to customize its appearance. You can select the page cover or the page content to be displayed in the card preview. You can also adjust the size of the cards and whether to fit the image to the frame or not.
Next, you can select which properties you want to be displayed. As you can see in the Gallery view below, I’ve chosen the month and year to be displayed on each card.

Use Notion Templates
The final tip for creating an aesthetic Notion setup on this list is… using Notion templates.
This one’s probably an obvious one, but it’s worth mentioning because pre-made Notion templates can save you so much time. There are plenty of templates to browse through in Notion’s Template Gallery, as well as on other parts of the Internet.
Even if you don’t plan on duplicating the templates into your own setup, browsing them can still be a good way to get inspiration.
As promised at the beginning of this article, you can get access to a free student Notion setup. To do so, just enter your email in the form below, and you’ll receive a link to the template immediately.
For a complete tour of this student Notion setup (link), click this link.
By signing up, you’ll get updates on future Notion student templates and tips for maximizing Notion’s potential. You’ll also receive biweekly emails on other helpful student tips and resources.
Overview of How to Create an Aesthetic Notion Setup
Since Notion provides a blank slate when you first get started, you might be overwhelmed by the options. However, to create an aesthetic Notion setup, all you have to do is follow these steps:
- Choose a color scheme and/or aesthetic.
- Customize the general page appearance.
- Click the three dots in the corner to adjust the basic settings. Then, select light or dark mode in your account settings. Finally, choose a page icon and cover (you can select from the ones provided by Notion, get them from a third-party source, or customize your own in Canva.)
- Create visual blocks.
- Use columns, divider blocks, and callout blocks to visually organize and categorize content. Try to put contrasting items next to each other (like text next to an image).
- Embed media.
- Customize text.
- Break up your text using smaller paragraphs, headers, and toggles. Change the background color and/or text color. Also, play around with custom fonts, quote blocks, and callout blocks.
- Use Gallery views.
- Create a Gallery view of a database and customize its appearance by clicking on the three dots in the corner.
- Use Notion templates.
- Duplicate Notion templates into your own setup or browse them for inspiration.
This may seem like a lot, but it’s all fairly straightforward. If you want to create an aesthetic Notion setup, all you have to do is dive right in and start playing around with the various features.
Notion’s interface is designed to be intuitive and user-friendly, so before you know it, you’ll be very familiar with how to customize your setup.
I hope this article helped you get started on customizing your Notion setup. If you have questions about any of the features mentioned in this article, let me know in the comments below!
For more on Notion and productivity, check out:
- All-in-One Aesthetic Planner App for Students
- How To Set Up Notion For Students
- How to Wake Up at 5am to Study—Tips From a Former Night Owl
- How to Get Your Life Together as a Student
- 11 Ways to Stop Getting Distracted by YouTube While Studying
- 11 Before Bed Journal Prompts for Better Sleep & Productivity

Learning With Angie is a place to share honest, unfiltered advice to promote student success. So if you’re a student (high school, college, or beyond) looking for tips on productivity, studying, personal growth, and more to reach your potential, this is the place! To read more about Learning with Angie, click here.

